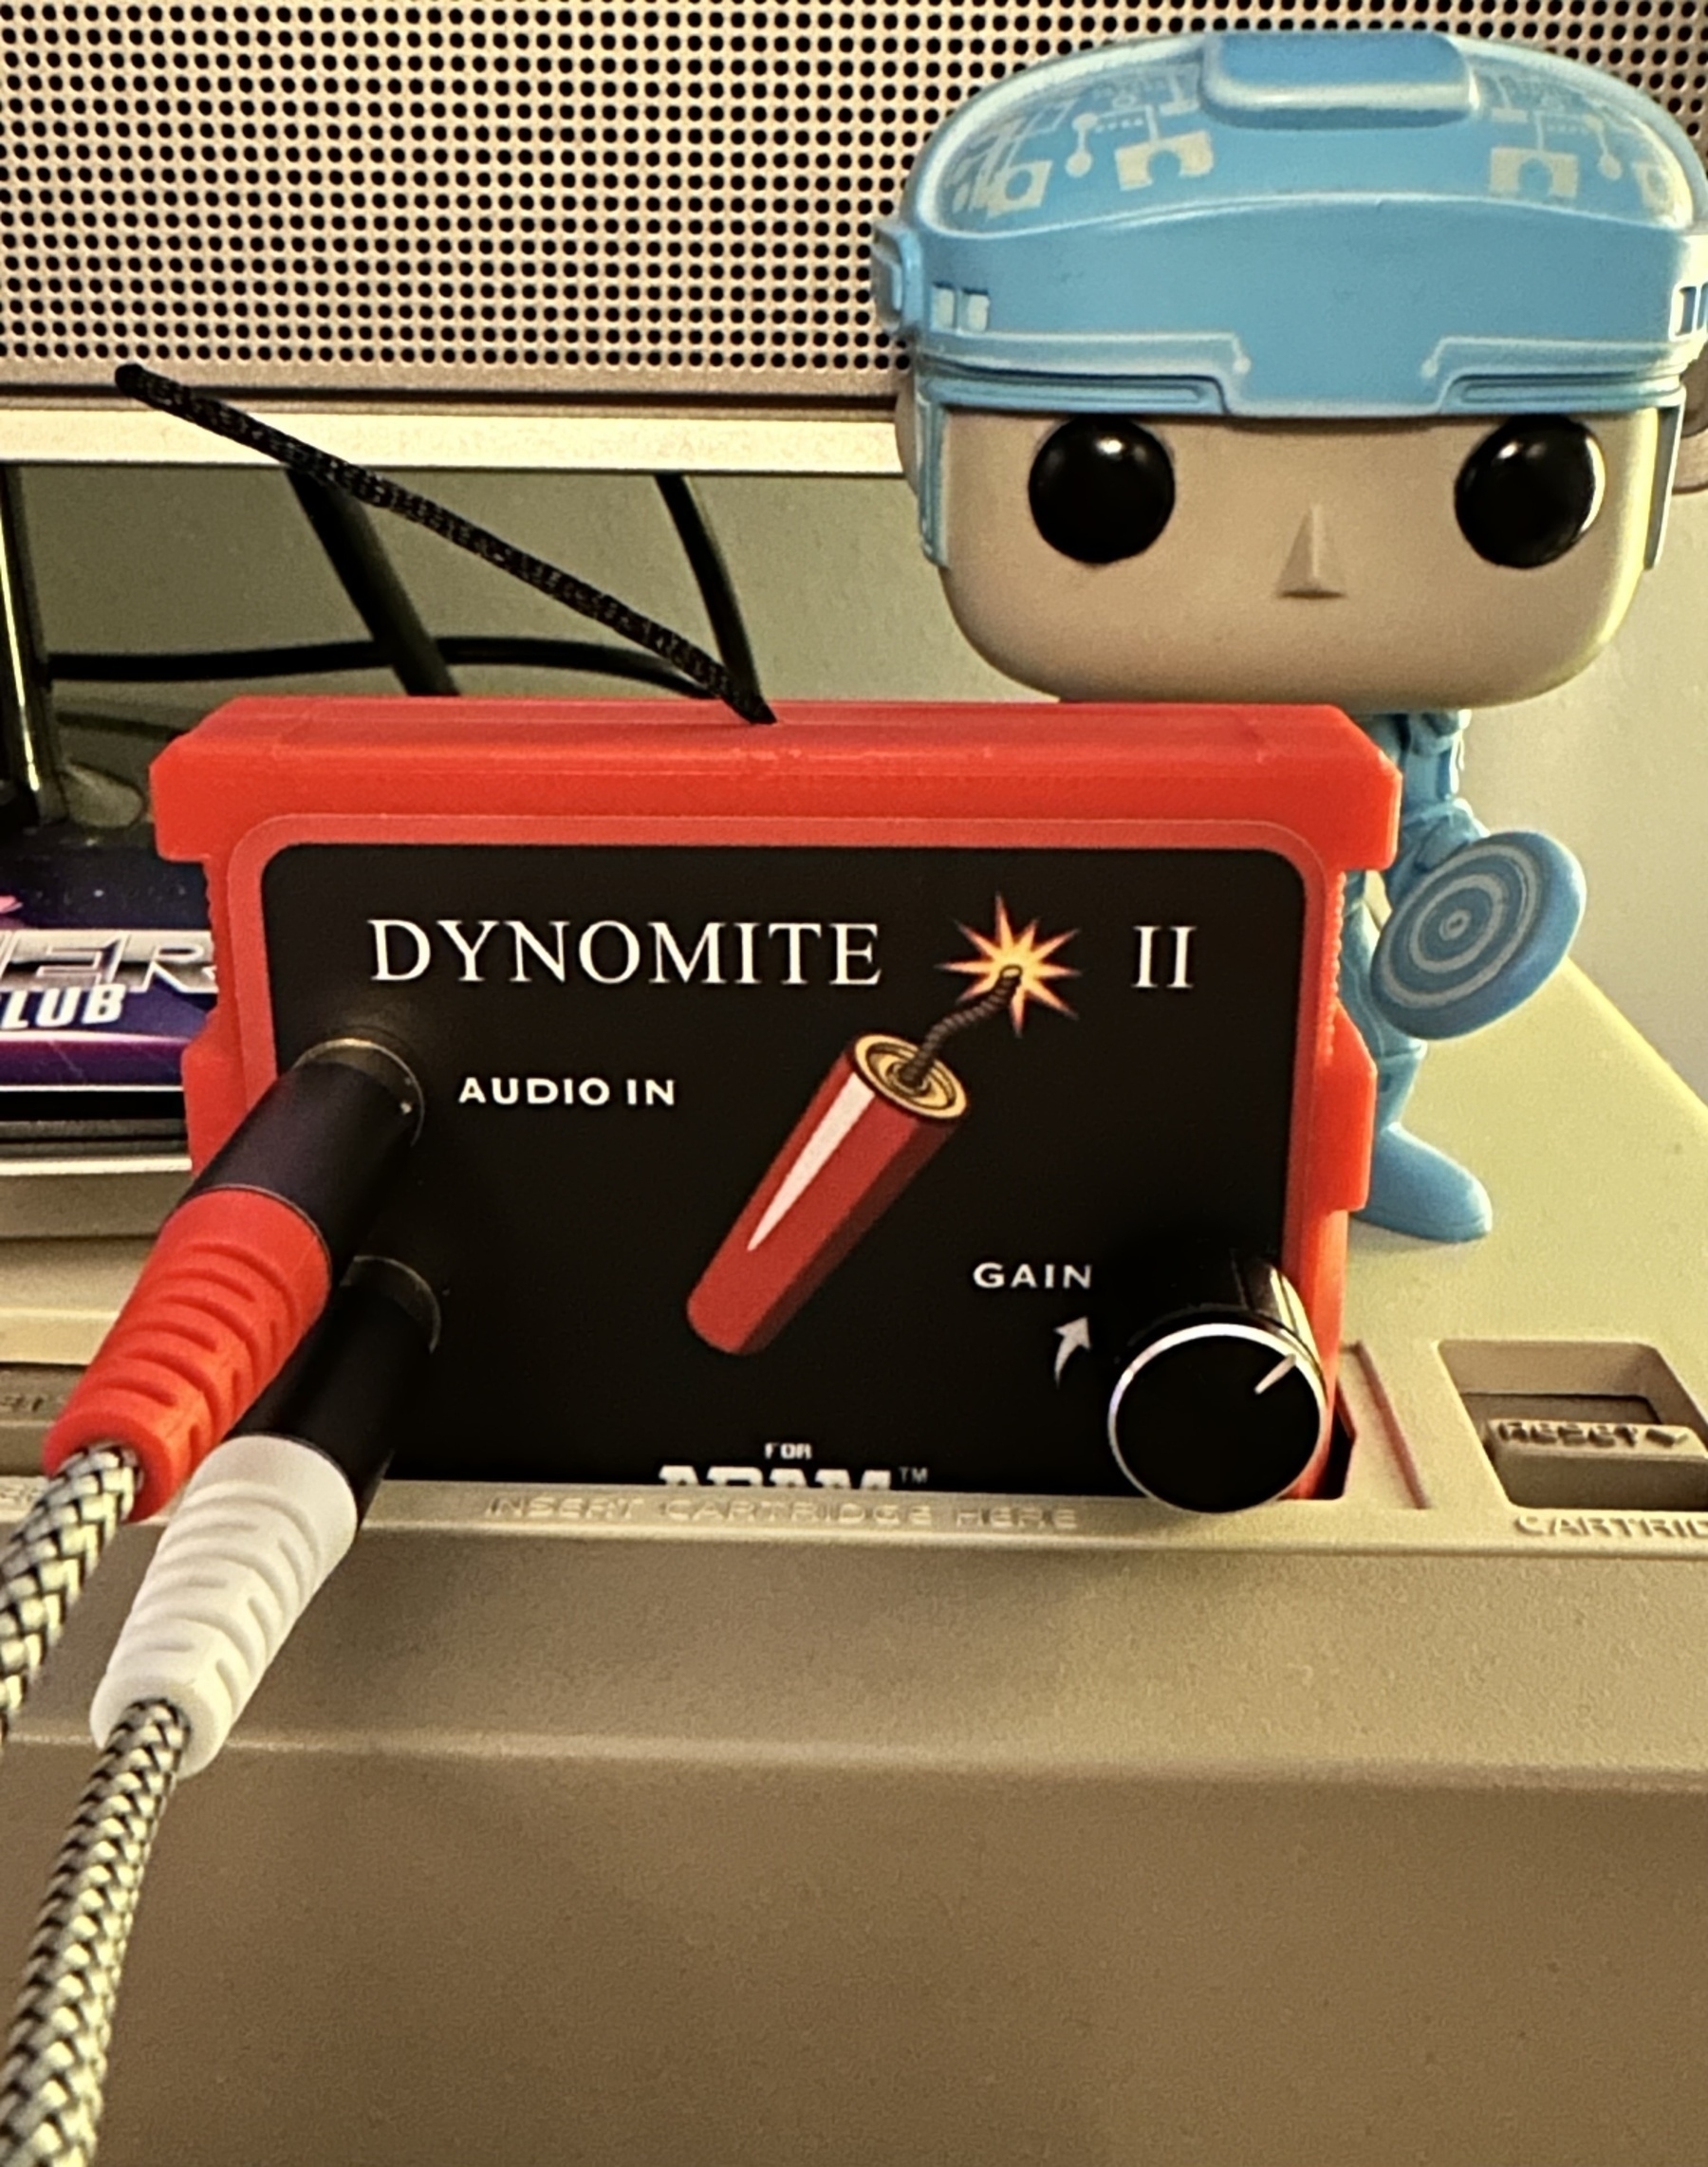
Capturing some audio samples with the Dynomite 2 for a fun personal project I’ve been planning.
On Saturday a package arrived at my door from 8-bit Milli - I had pre-ordered one of his new ADAM Power Supplies. It’s a very unique design that clips right onto ADAM like a sidecar. I really love it because it helps reduce some of the infamous ADAM “sprawl” and makes for a clean, compact setup. It was packaged safely and installation was a breeze - Milli did a great job on this product. It even came with a free 90-day membership to the 👾 Retro Gamers Club. I happened to have an ADAM sticker that I got a couple of years ago for supporting the ADAM Archive in my drawer so I stuck it on the side of the power supply. Perfection!
A fun new piece of ADAM hardware from Lundy Electronics arrived just in time for #FebruAdam! Stay tuned…
I recently got the ADAM-beige variant of Opcode’s Super Game Module (SGM). It’s a great expansion for the Coleco ADAM (or ColecoVision) and probably my favourite thing about it is its amazing audio capabilities. Games that are SGM-enhanced can feature incredible music and sound effects thanks to the SGM’s sound chip.
Unfortunately there’s a slight problem enjoying that great sound thanks to a design flaw with ADAM’s wiring. The misplacement of a single wire that runs from the 7-pin DIN (A/V port) results in unbalanced audio. Essentially, ADAM’s own audio works fine but the audio produced by any side-expansion units like the Super Game Module or Expansion Module #1 would have very low volume. That left me with two options:
After a week or so of pretending I could live with option one I eventually worked up the nerve to attempt the fix. John Lundy wrote a helpful document that sums up the issue and how to fix it. For experienced hardware tinkerers or engineers this is a very simple job. As for me, I’d honestly never used a soldering iron before so it was a daunting task!
After dismantling my ADAM – my one and only ADAM that I’ve had since the 80s – I found the green wire that needed relocation. I first removed the blob of dried up hot glue that covered the spot where the wire was connected to the board. Here’s what I was looking at:
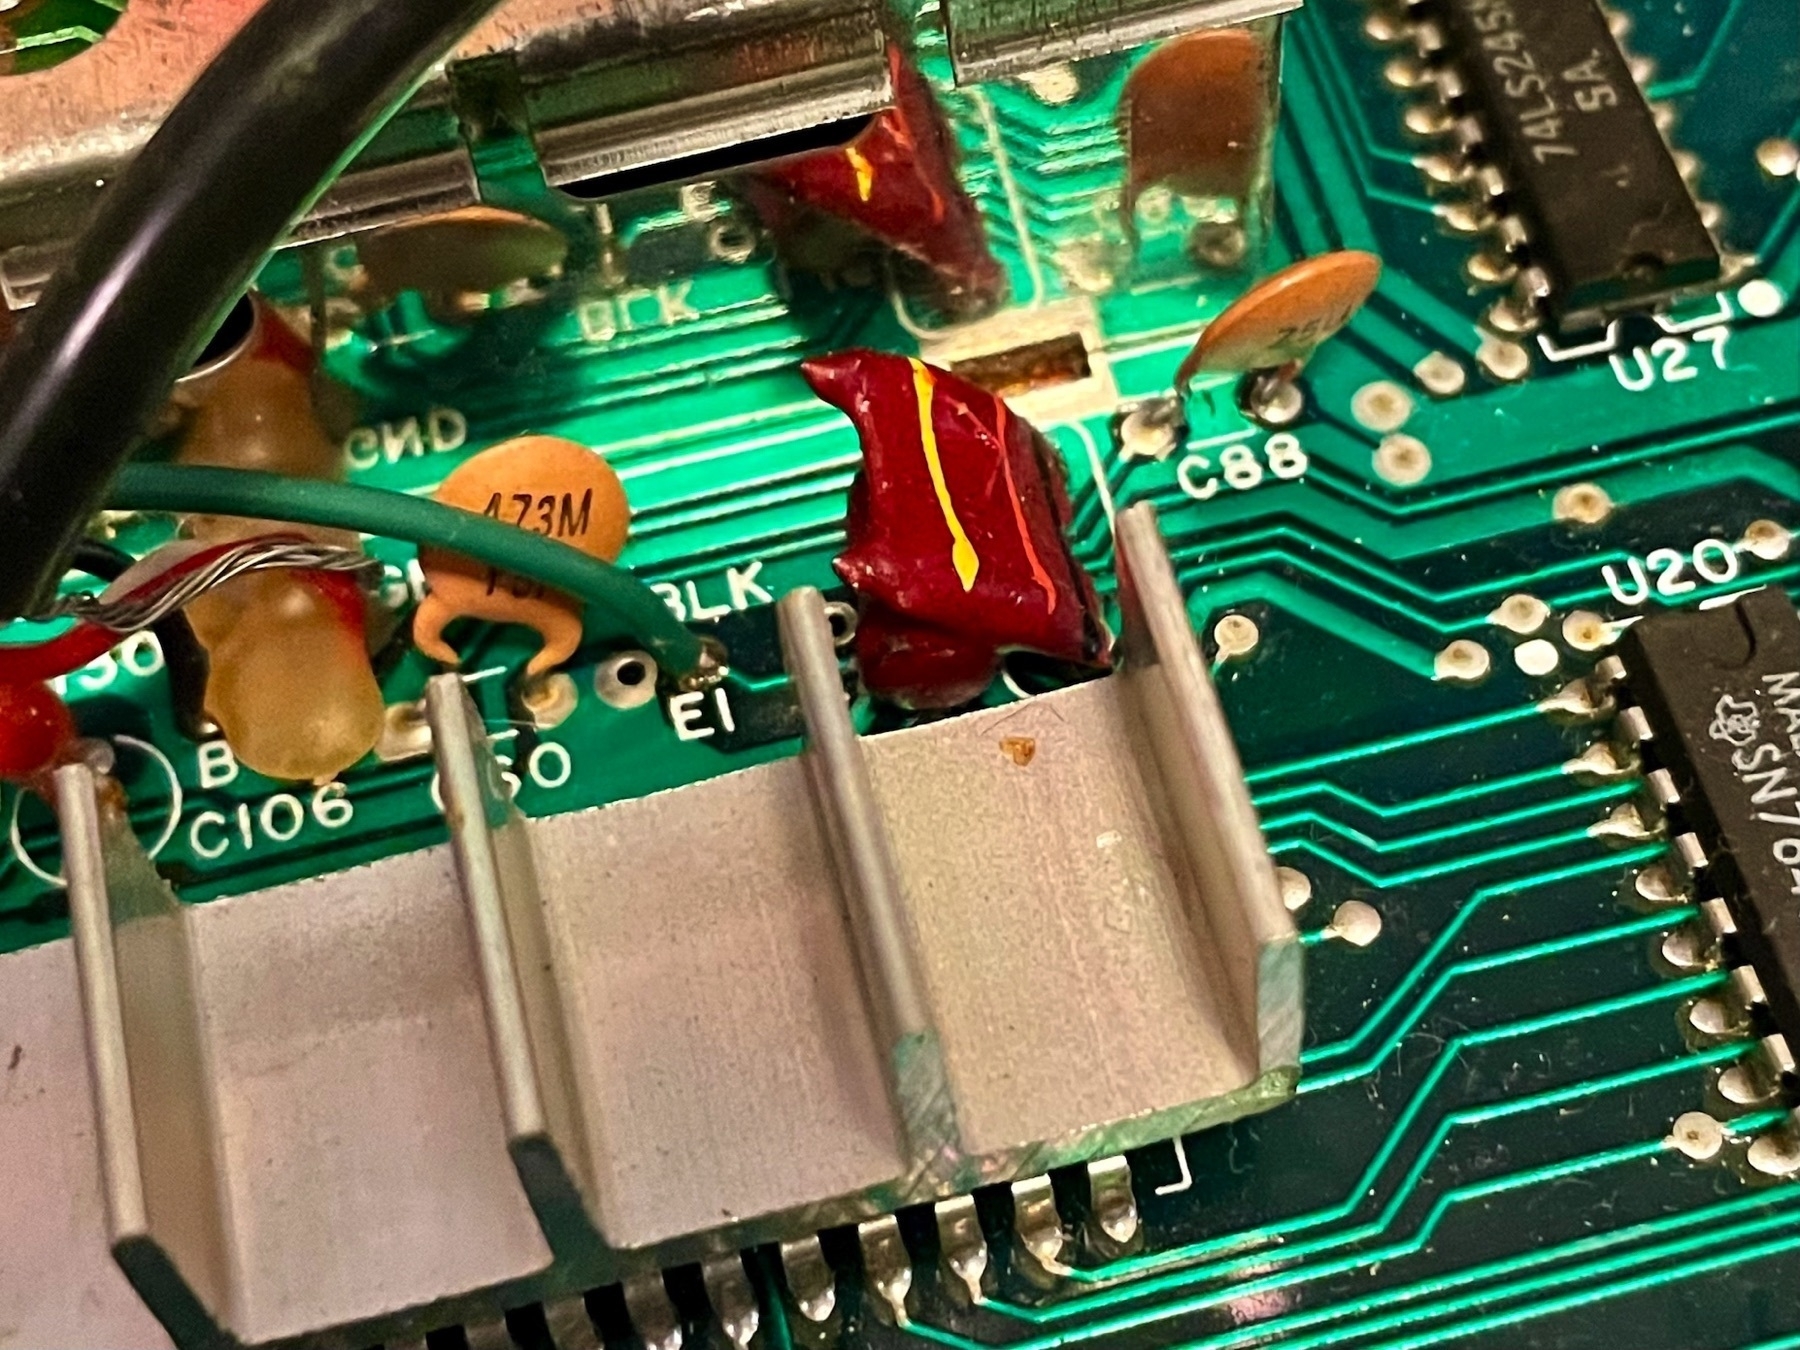
I hesitantly heated up the soldering iron and got to work trying to remove the wire. After after a few seconds of trying (and burning the green covering of the wire in the process) I decided it’d be easier to snip the wire as close to the board as I could instead. See the capacitor located at C88 in the photo? The fix is to solder the wire to the right side of that capacitor. As I said earlier I’d never worked with a soldering iron before. I was nervous! My hands were shaking so much and I couldn’t get the solder to hold the wire in place. Eventually, my persistence paid off and I got the job done. Here’s the “after” shot:
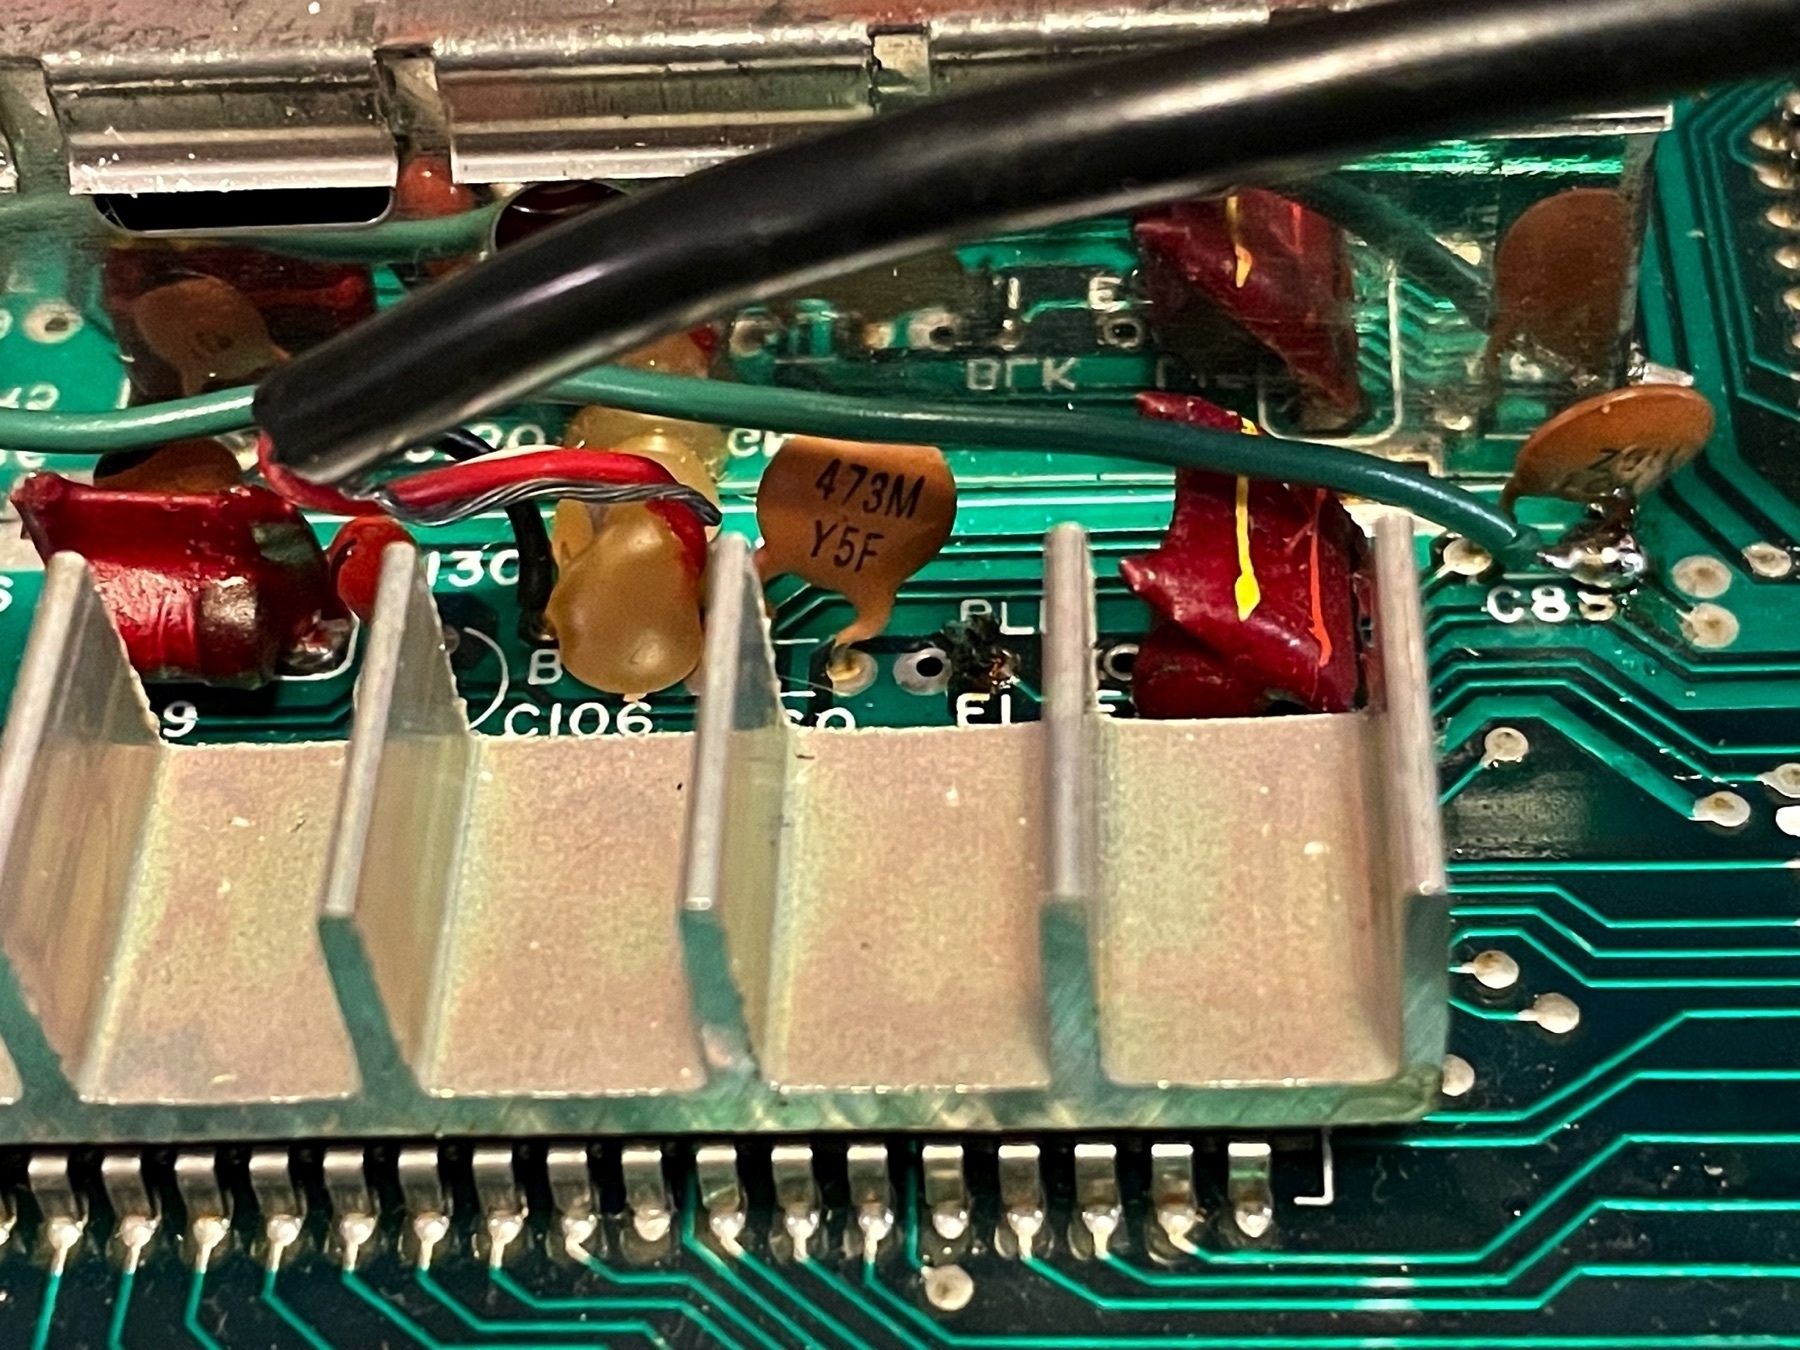
I know… definitely not the neatest job! The slight scorch marks on the capacitor had me worried that I might’ve damaged it. I reassembled my ADAM and powered up. I was relieved when the familiar beep of ADAM’s SmartWriter greeted me so I excitedly fired up an SGM game (Thexder) and soaked up the glorious sound! Mission accomplished.
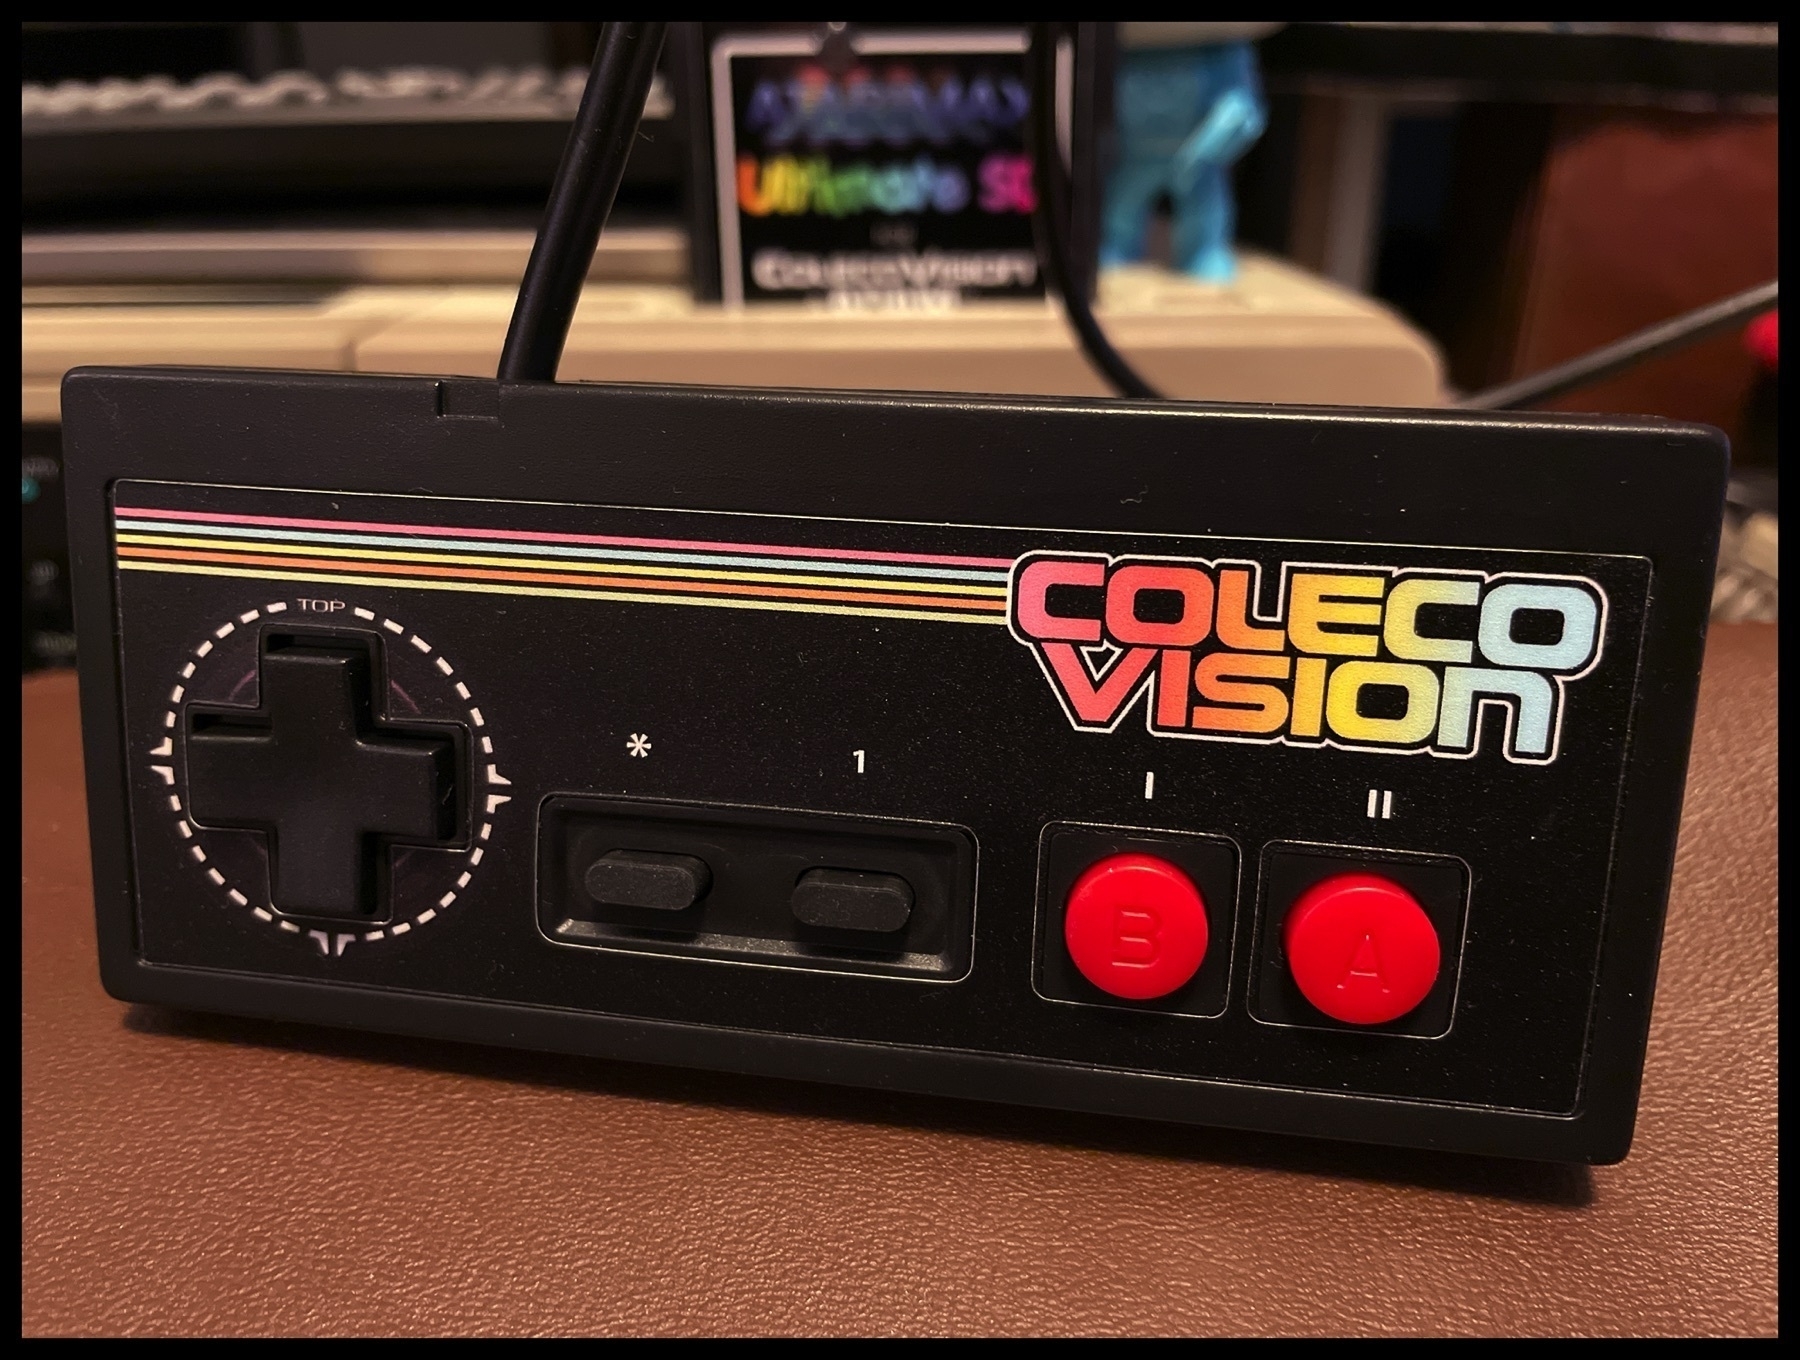
I’ve always been a big fan of the original NES D-pad style controllers. After all, I spent many hours of my youth holding one! So… when I discovered a shop on eBay that was making & selling custom ColecoVision controllers in this style I had to have one. 🤤
It arrived this week and its even better than I expected. The care that went into making this controller is very evident when you see it and even more so when you hold it. The build quality is remarkable and it actually feels even better than I remember the old NES controller being. Not to mention - it just looks great! Retrogameboyz has truly done a wonderful job on this product.
Of course, by not featuring a numeric keypad like the standard Coleco controller there are some games (mainly ones that utilize overlays) that won’t be playable with this. However the vast majority will play just fine and (bonus) will be made even more enjoyable by virtue of it simply being more comfortable than the original ColecoVision controller. The “select” and “start” buttons on this controller have been wisely mapped to the keypad *️⃣ and 1️⃣ buttons, respectively. This combo will get you through the start screens and select screens of most games. For games where this is insufficient you can connect a standard Coleco controller with a Y-cable to port 1 or do what I do and leave a Coleco controller plugged into the second joystick port. If all else fails, you can simply swap the controller in port 1 after the menu screen.
This controller - combined with my recently acquired AtariMax Ultimate SD will provide me with hours of retro gaming fun on my ADAM! If you’re interested in getting one of these awesome gamepad controllers visit Retrogameboyz on eBay. He also offers custom-styled versions for other retro systems like the TI-99 4A, Sega Master System, Atari, MSX, Commodore 64, Amiga, Odyssey, and even Vectrex. Game on! 👾
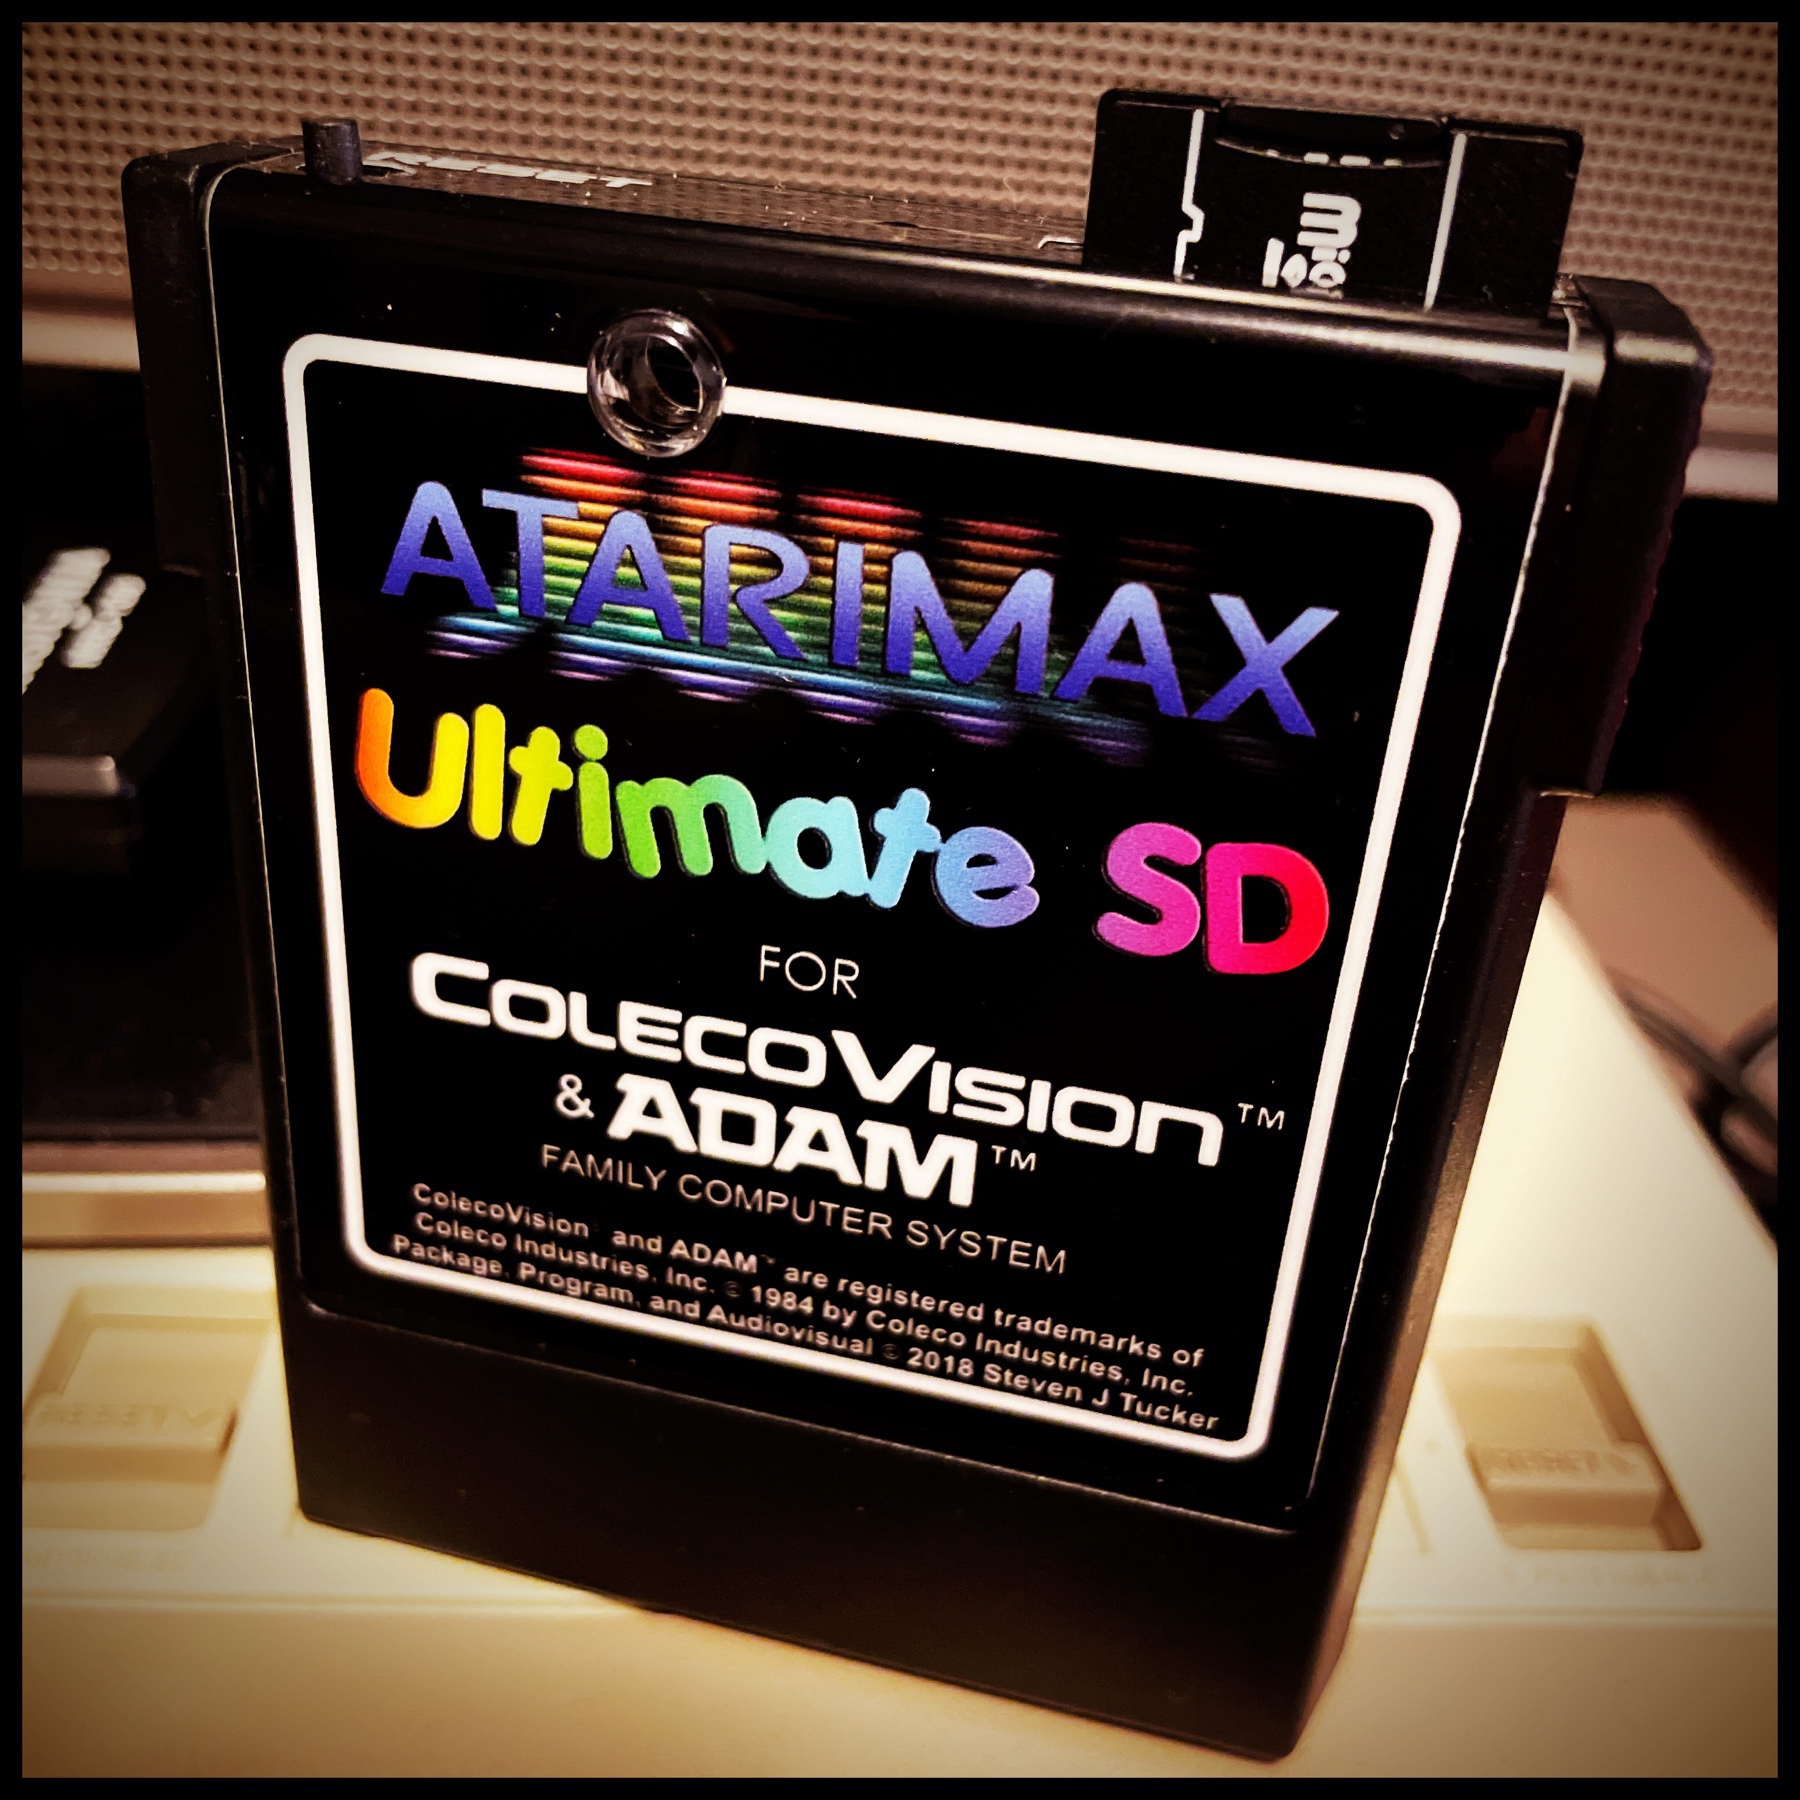
Look what arrived at my door this week! This is the Atarimax Ultimate SD cartridge.
This beauty lets me easily play any ColecoVision game ever made in addition to the hundreds of quality homebrew indie games that are available. Believe it or not, awesome new games are still being designed and released for ColecoVision/ADAM after all these years!
While the old original games were all 32K or less, many of the new ROMs are much larger featuring enhanced graphics and sound. My ADE Lite drive already has the capability to load (most) of the 32K ROM files but any of the larger games were out of reach for me… until now!
If you’re interested in picking one up for yourself head over to www.atarimax.com.
No, not the Men In Black.
I’m talking about the new MIB238 (Multi-purpose Interface Board) for the Coleco ADAM! The MIB238 is an incredibly versatile expansion card that installs in slot #2 and provides ADAM with these amazing features:
All of that functionality is packed onto one elegant board. To make things even more incredible this board doesn’t require any external power source… it is completely powered by the ADAM itself. You can see why I consider this to be the holy grail of ADAM expansion cards!
The MIB238 was created by Eric Pearson. Eric is one of the most knowledgeable people in the ADAM community and his contributions are many (including the awesome SD-DDP drive). His MIB238 project is a modern redesign of the legendary Micro Innovations “MIB3” card. An original MIB3 card for ADAM is almost impossible to find these days (I’ve tried!) so a new card offering 100% compatibility with the original is a true godsend. You can find Eric’s project on GitHub. I was personally thrilled when Eric announced it because it provides ADAM owners with a viable option for bringing their beloved computers online or connecting them to other peripherals like dot matrix printers or 80-column displays. The only problem (for me) is that the MIB238 is a DIY hardware project that is above my skill set. Enter John Lundy.
John Lundy consistently builds top-notch hardware for the ADAM. His tiny-but-mighty ADE Lite was one of the first things I bought when I got back into ADAM computing. His work is impeccable! So when I saw on Facebook that he would be putting together a small run of MIB238 cards I snapped one up in an instant. It arrived this week and it does not disappoint. Here’s a picture of it in all its glory:
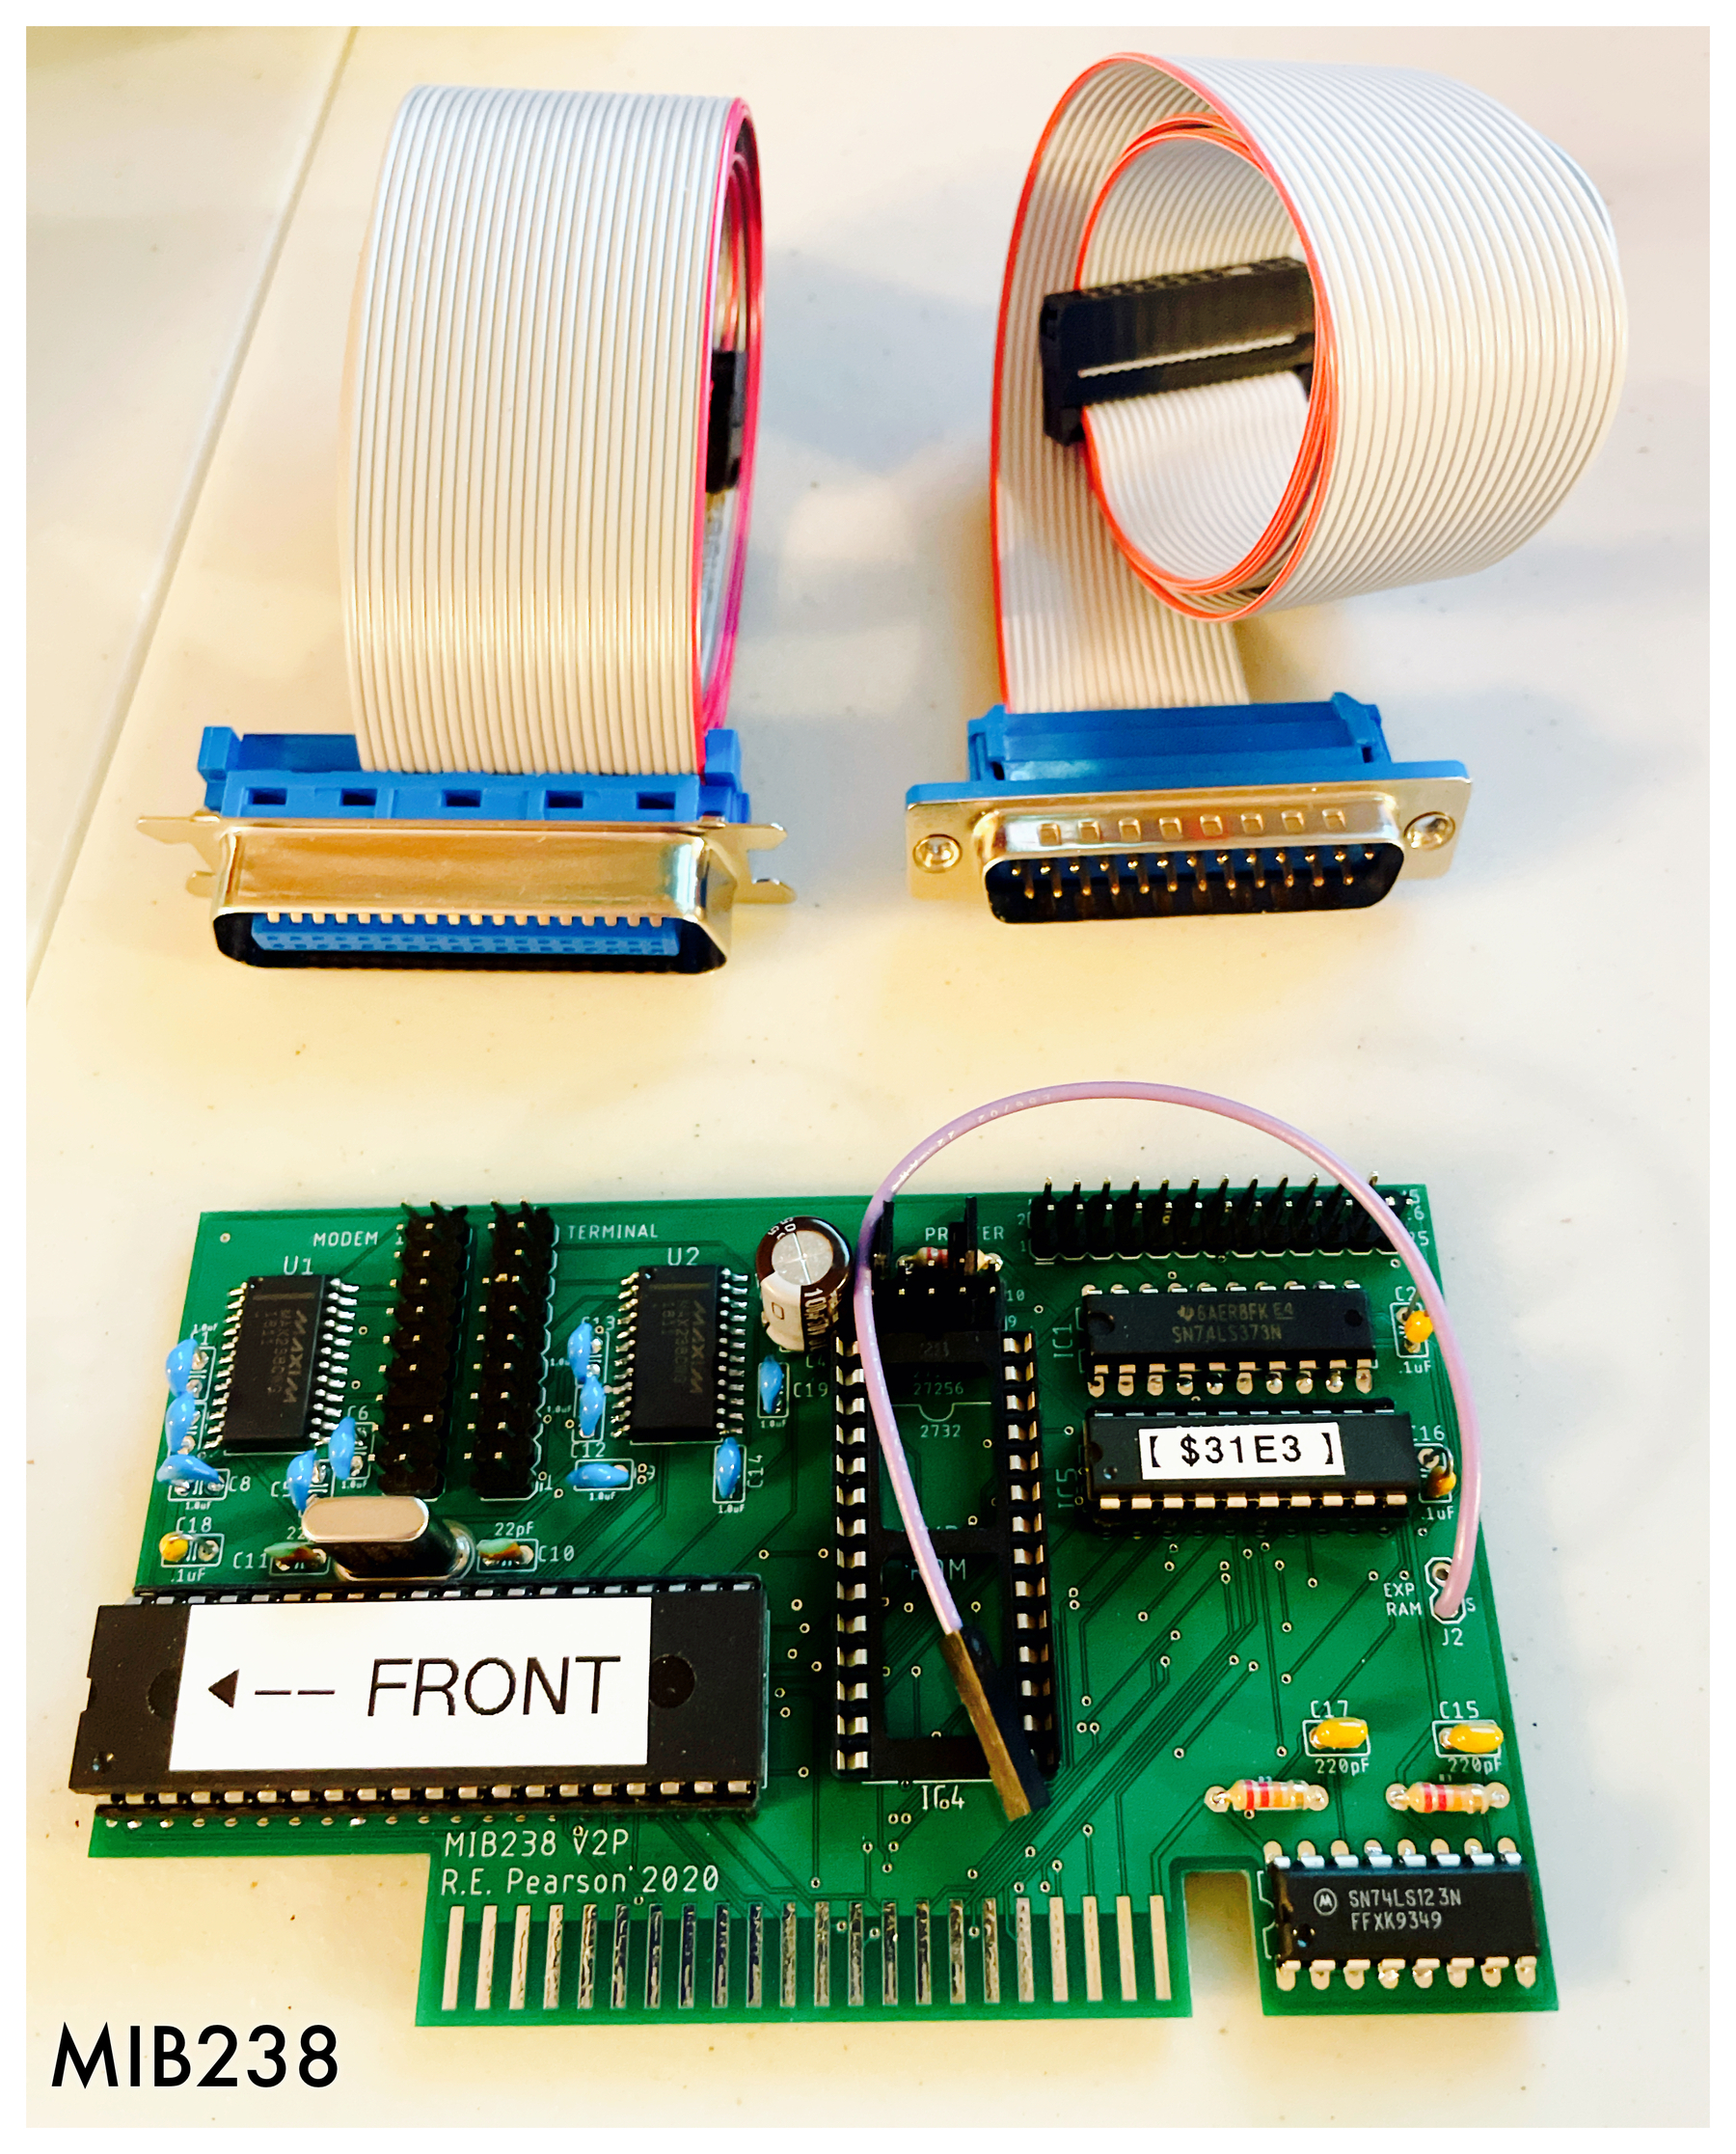
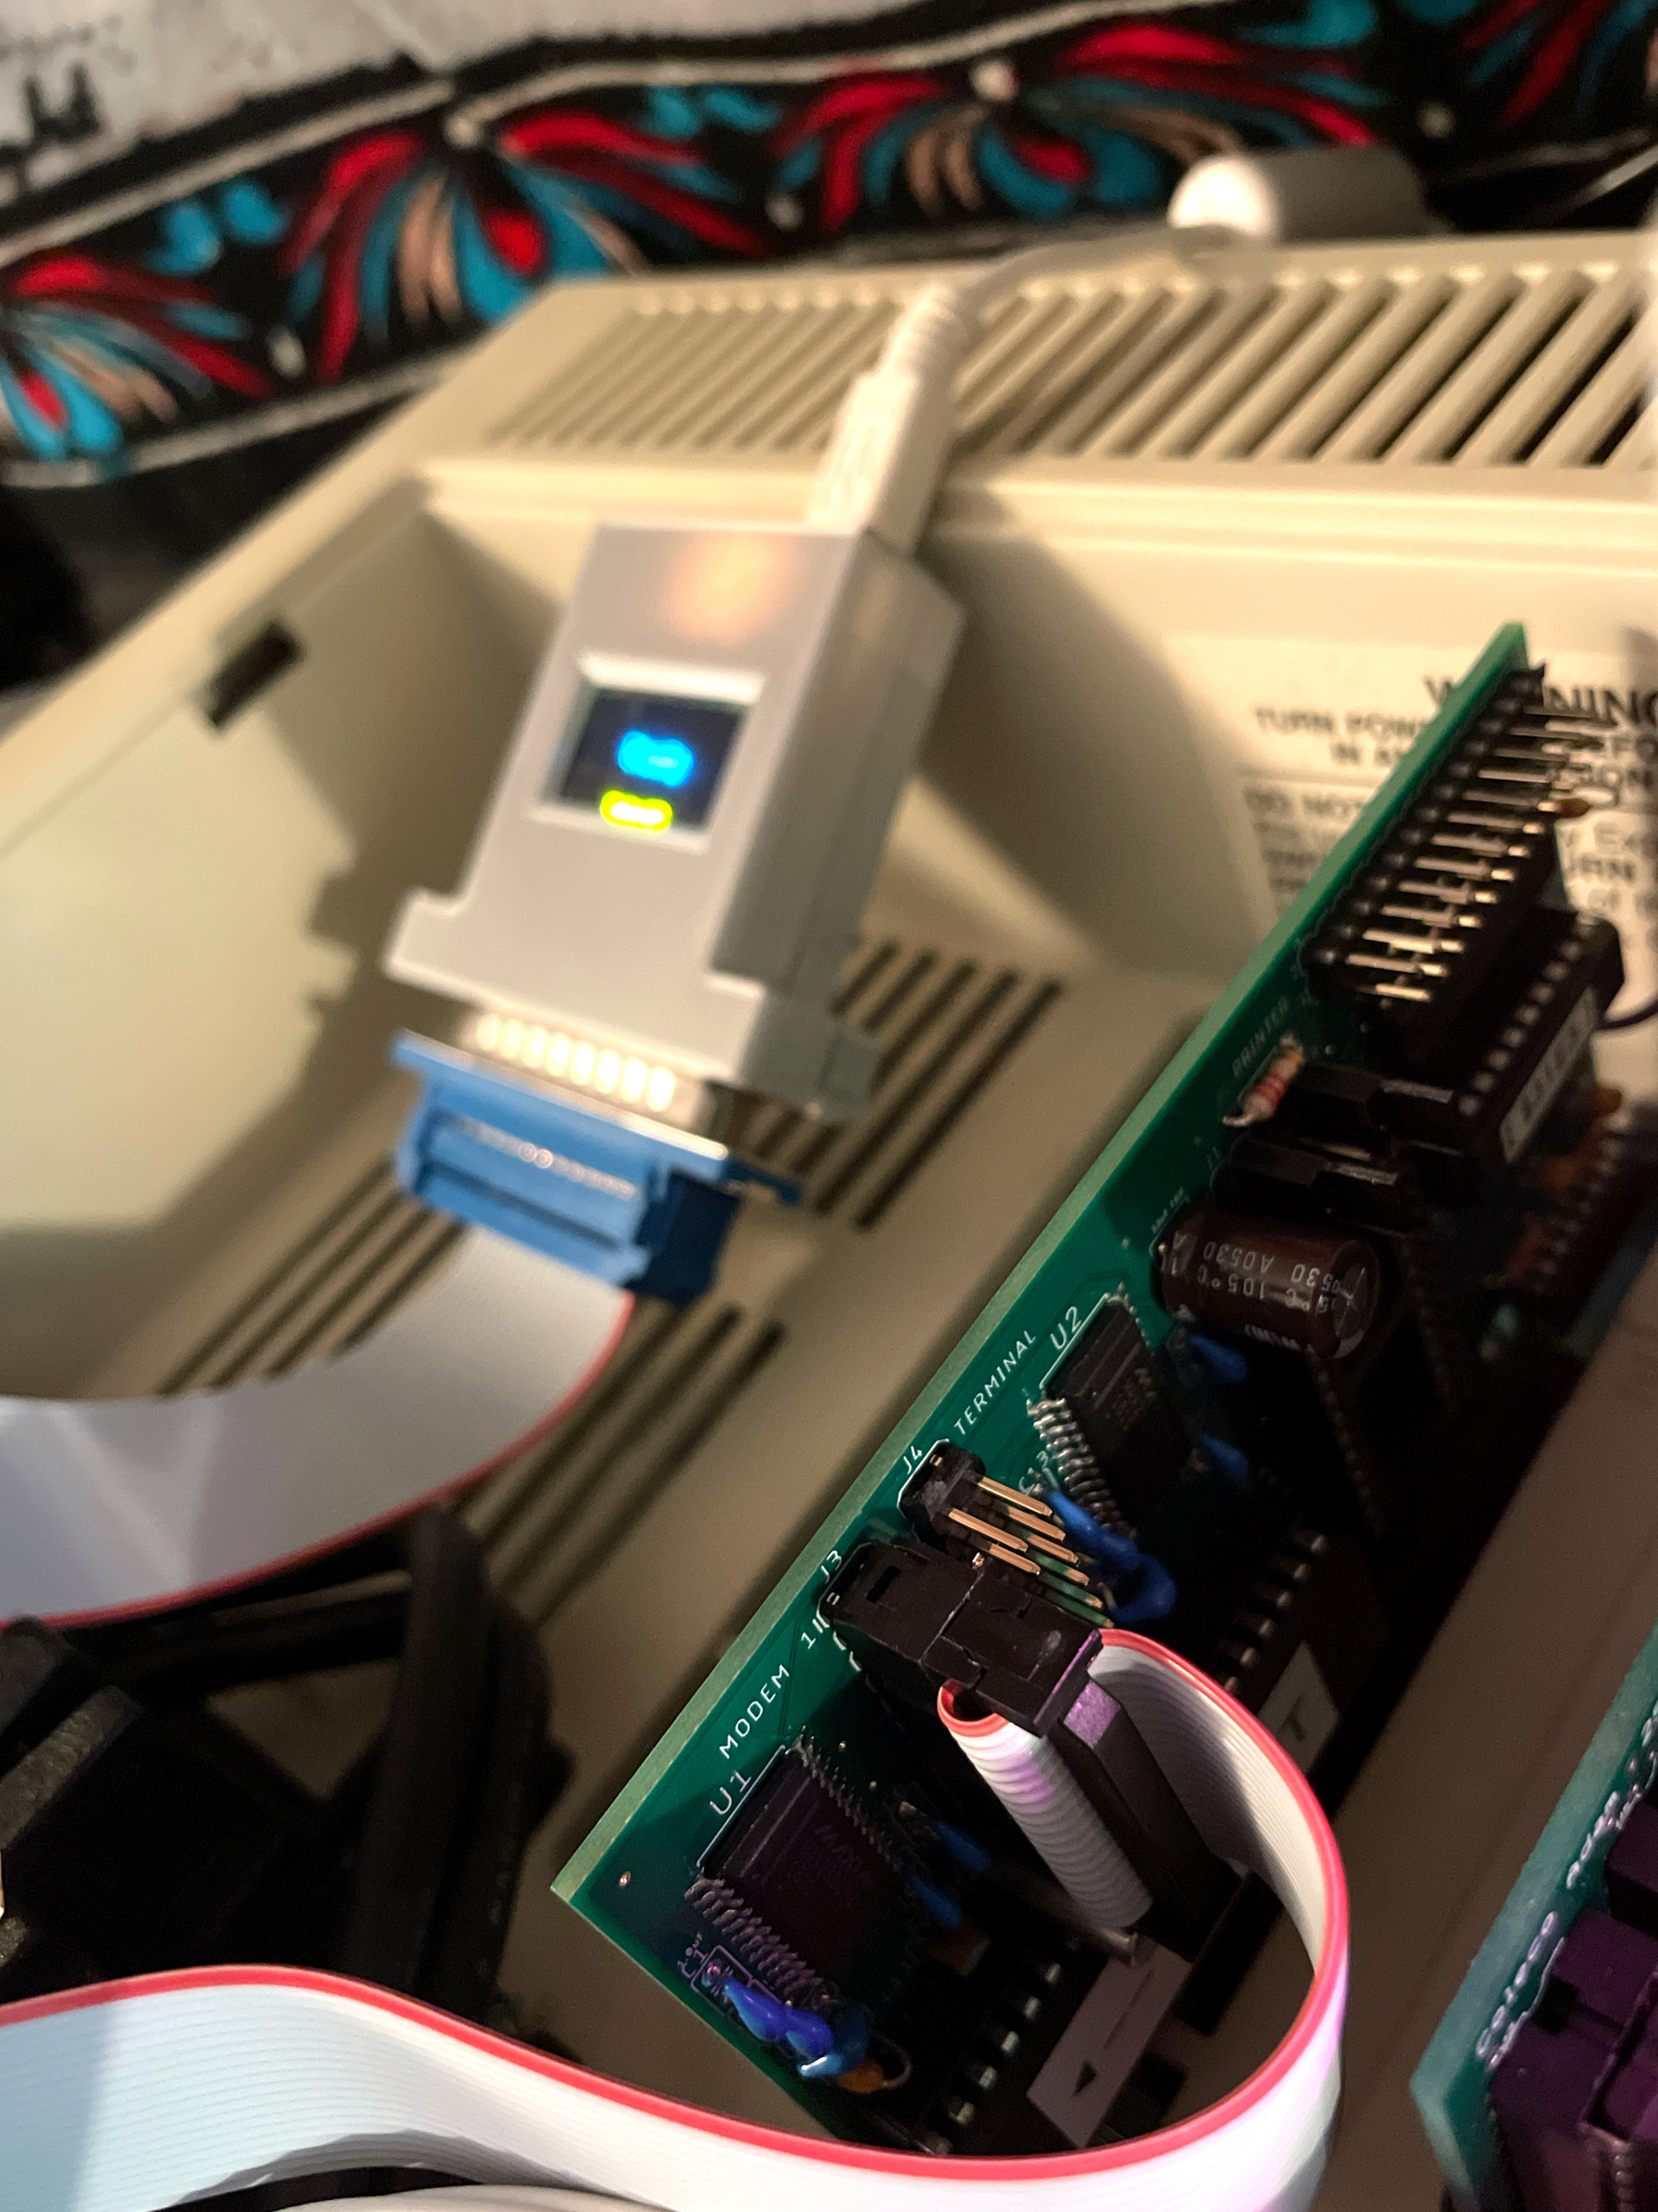
As you can see, I got one serial cable and one parallel cable with the card. I don’t currently have a dot matrix printer but I may get one some day so I have the parallel cable just in case. The serial cable will be connected to my WiModem232 to get my ADAM on the internet again since my external Orphanware/HLM-GLK serial device is (sadly) no longer operational.
As I mentioned, the card installs in slot #2 which meant I did have to remove my dedicated RAM expansion addressor card. However, this was not a problem since the MIB238 includes an addressor connection wire which works flawlessly with my MicroFox 256K RAM expander.
The MIB238 card is simply an incredible addition to my ADAM and I really want to thank Eric and John for making it a reality!
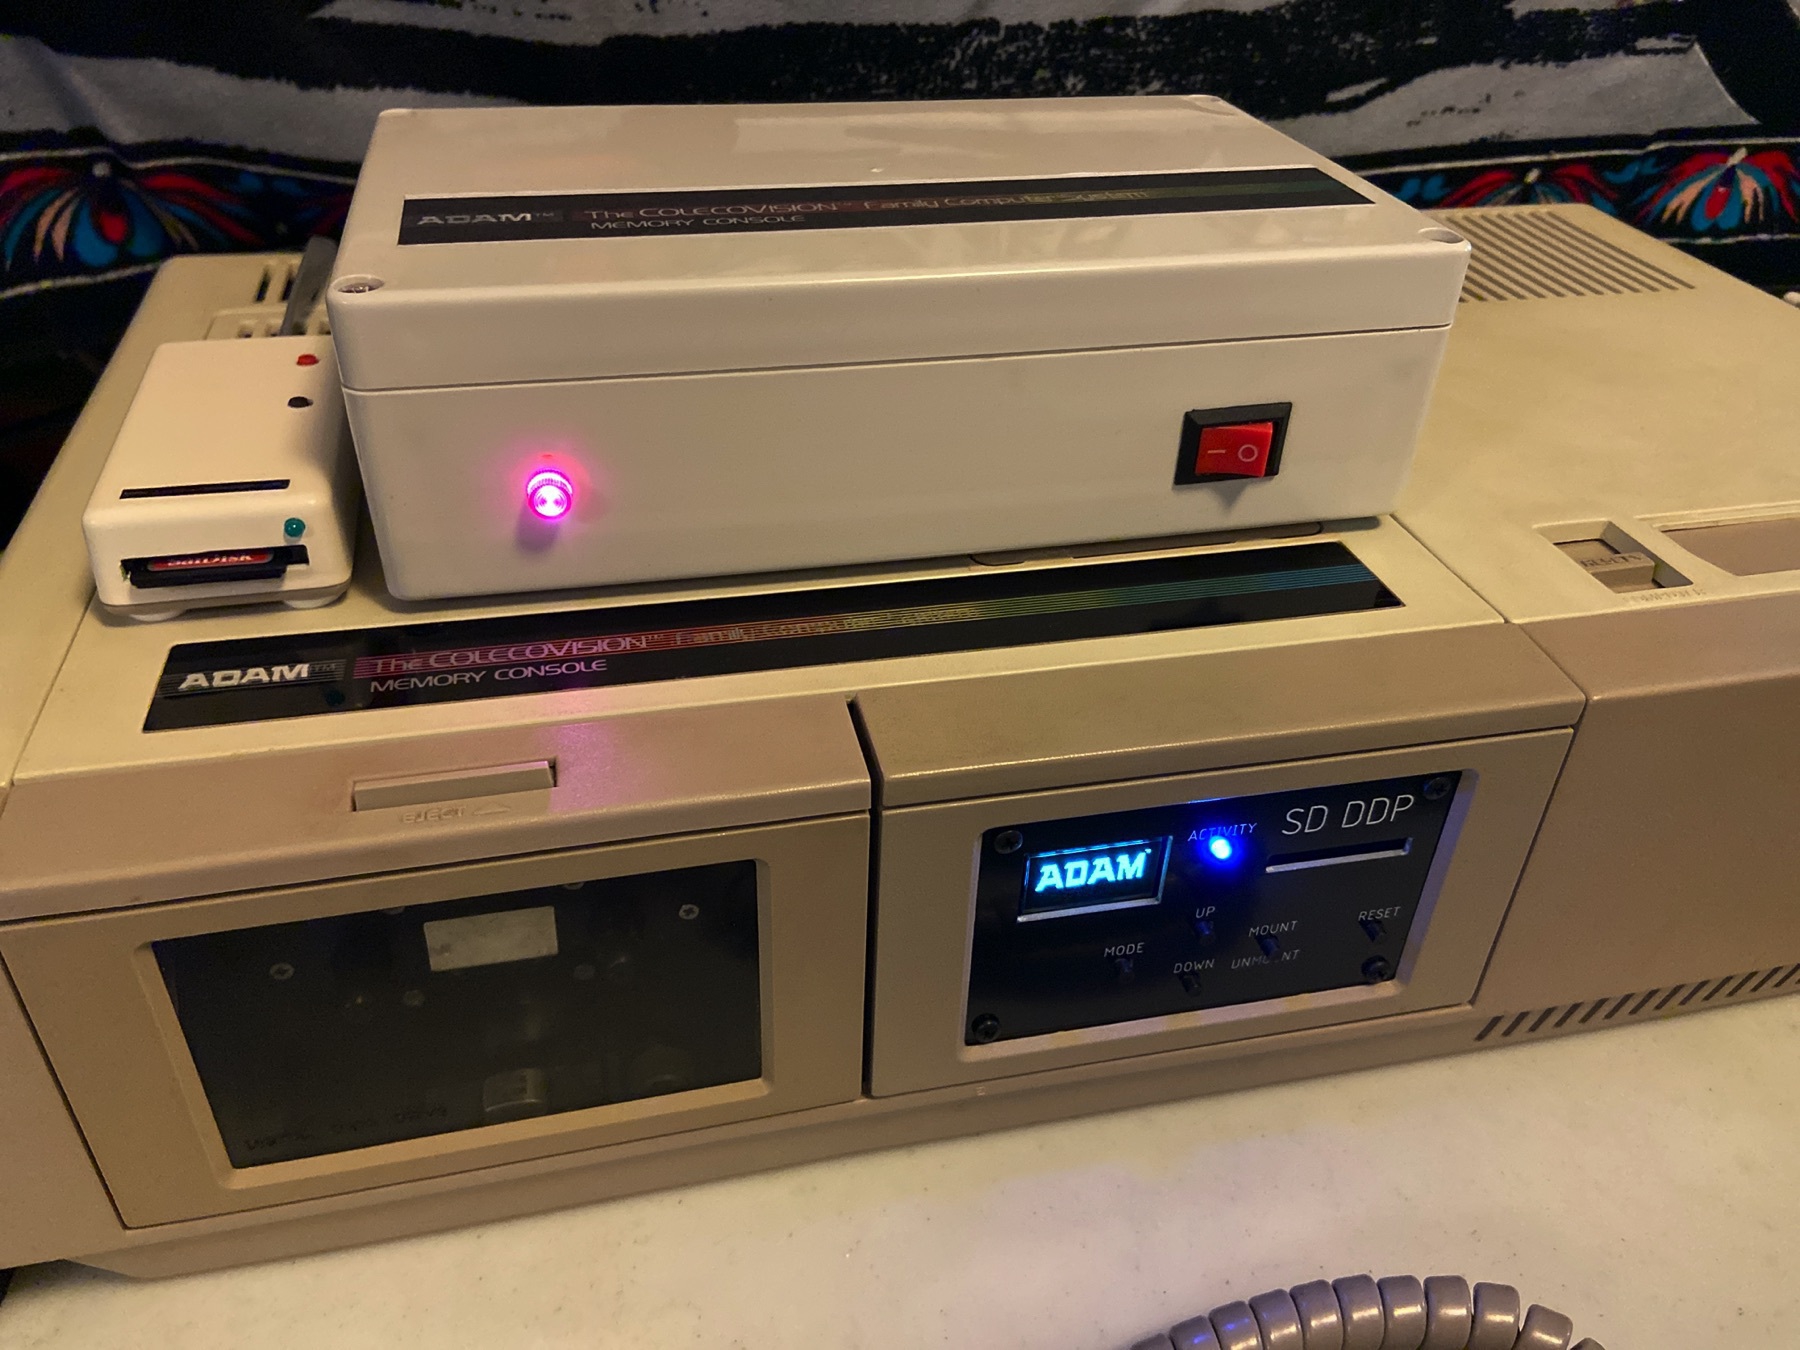
Some new ADAM hardware goodies arrived this week!
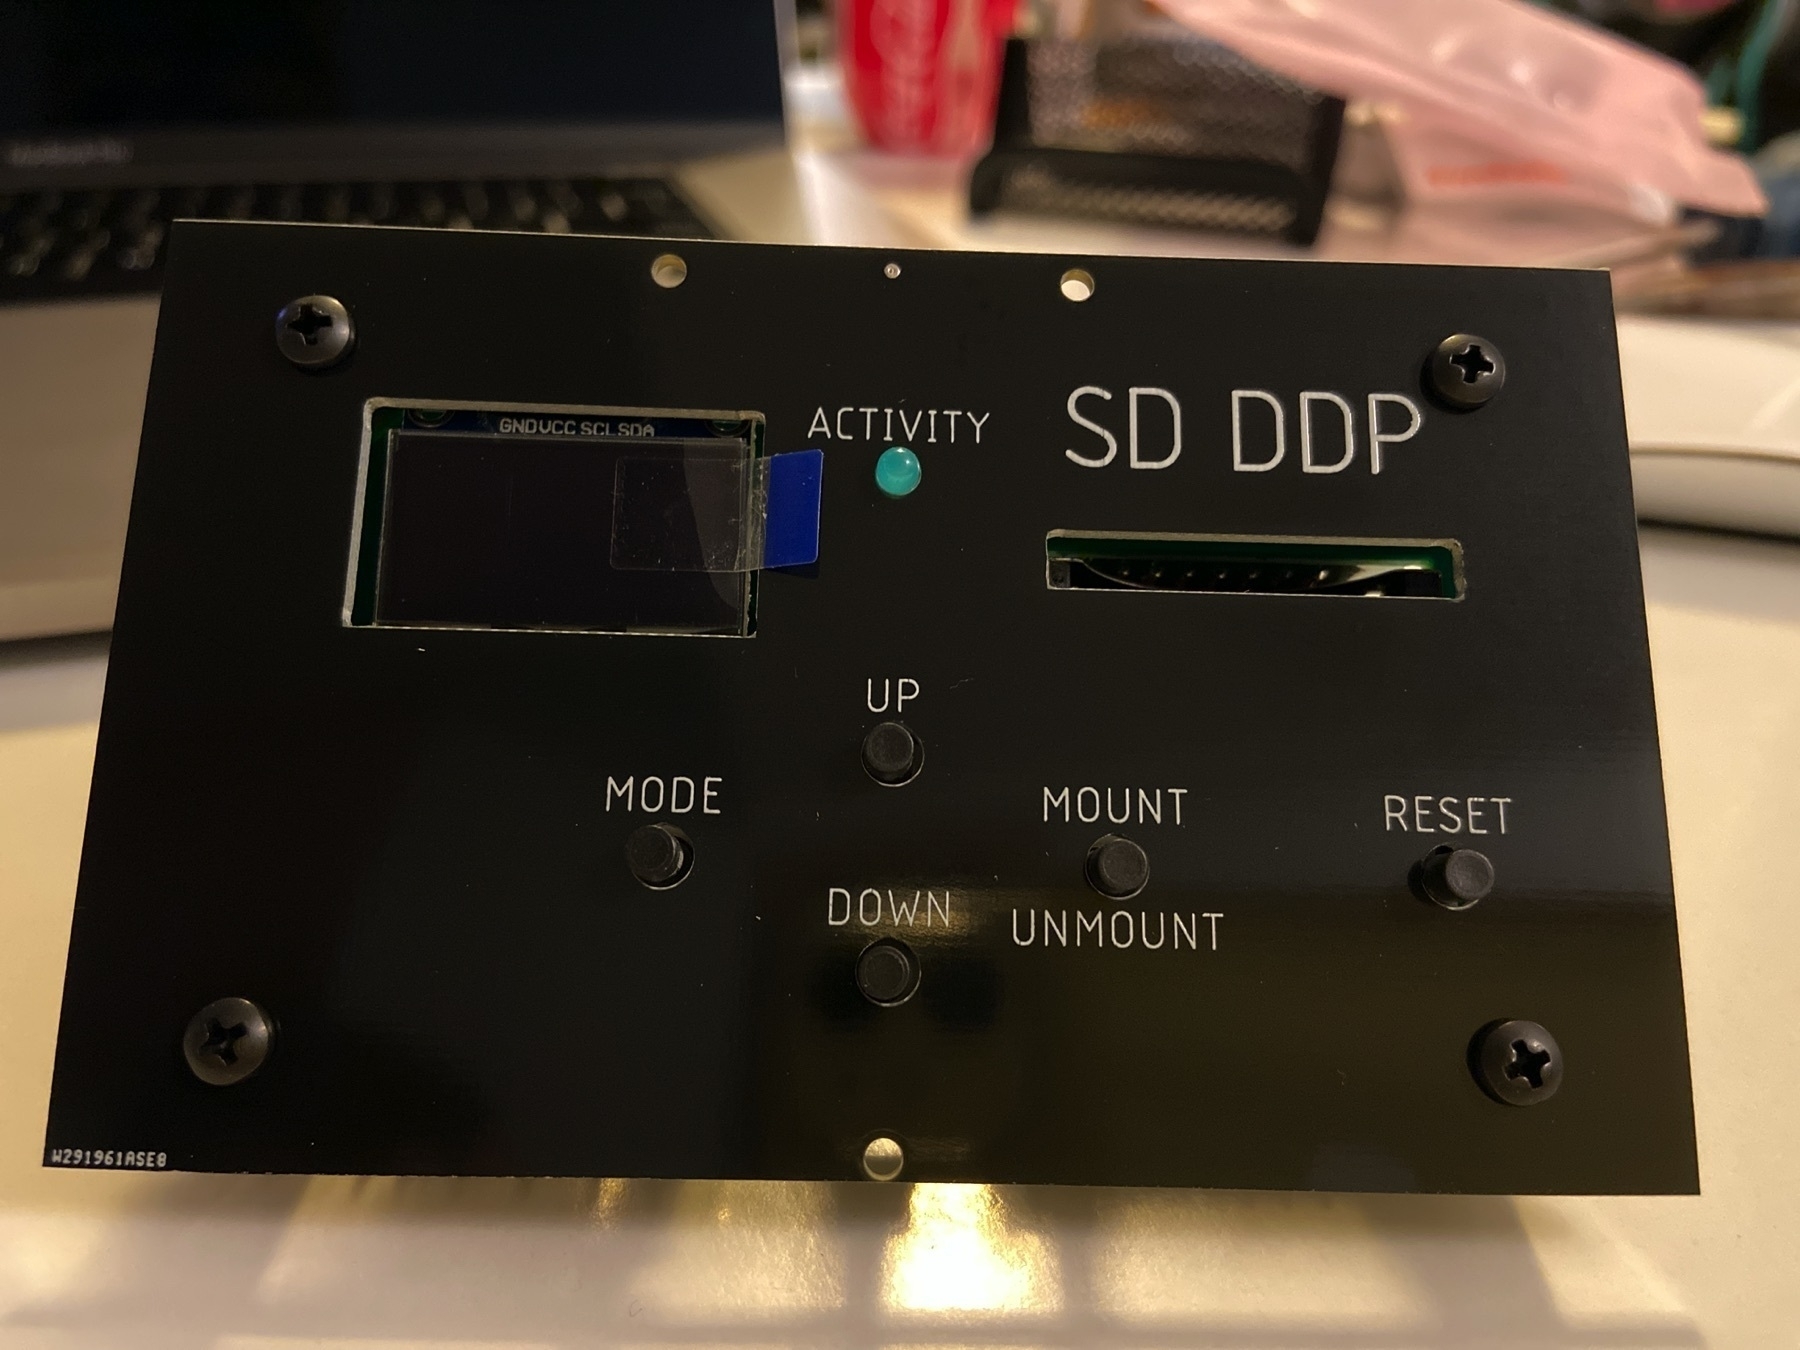
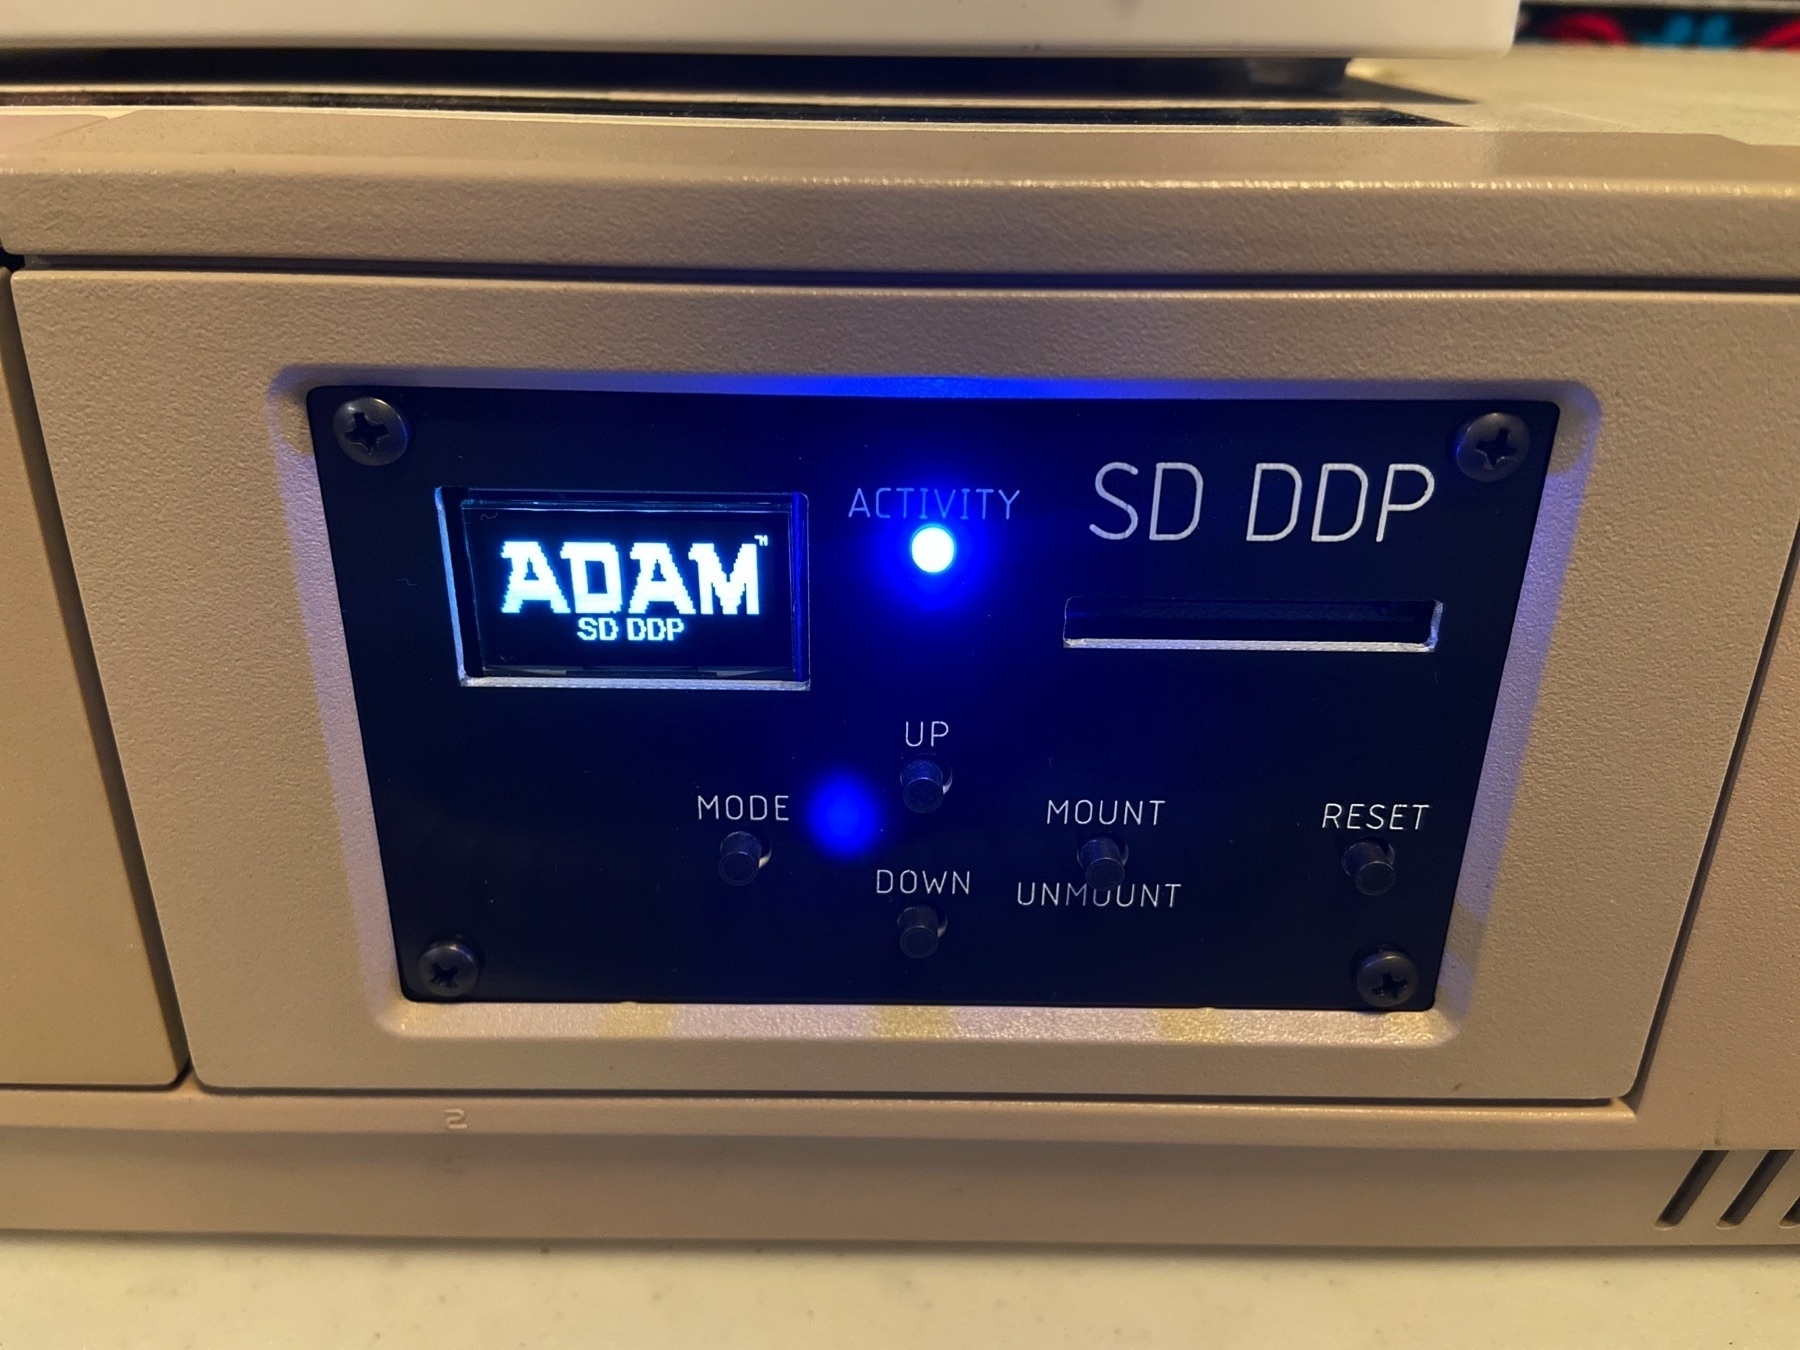
I am thrilled to be one of the first people in Canada to get my hands on the awesome new ADAM SD-DDP drive! The SD-DDP drive uses SD cards and .DDP (Digital Data Pack) files (readily available on the ADAM Archive) to perfectly emulate an original ADAM Digital Data Drive. ADAM treats it just like a real DDP drive so it doesn’t need any software drivers… a true thing of beauty!
The SD-DDP project was originally created by Eric Pearson who generously shared all of the details on GitHub. Hardware guru John Lundy was able to use Eric’s plans and code to produce a beautiful professional-quality, user-installable device which he then made available for sale to all members of the ADAM community via the Coleco ADAM Facebook Group.
The second piece of hardware that arrived at my door this week was built by none other than ADAM legend James Walters (of Walters Software Co). It is an external power supply that negates the need to keep my aging SmartWRITER printer connected. The power supply is well built and looks fantastic as it perfectly complements ADAM’s memory console.
Check out the pictures! The ADAM community is very fortunate to have such incredibly knowledgeable, generous, and talented folks in its ranks.

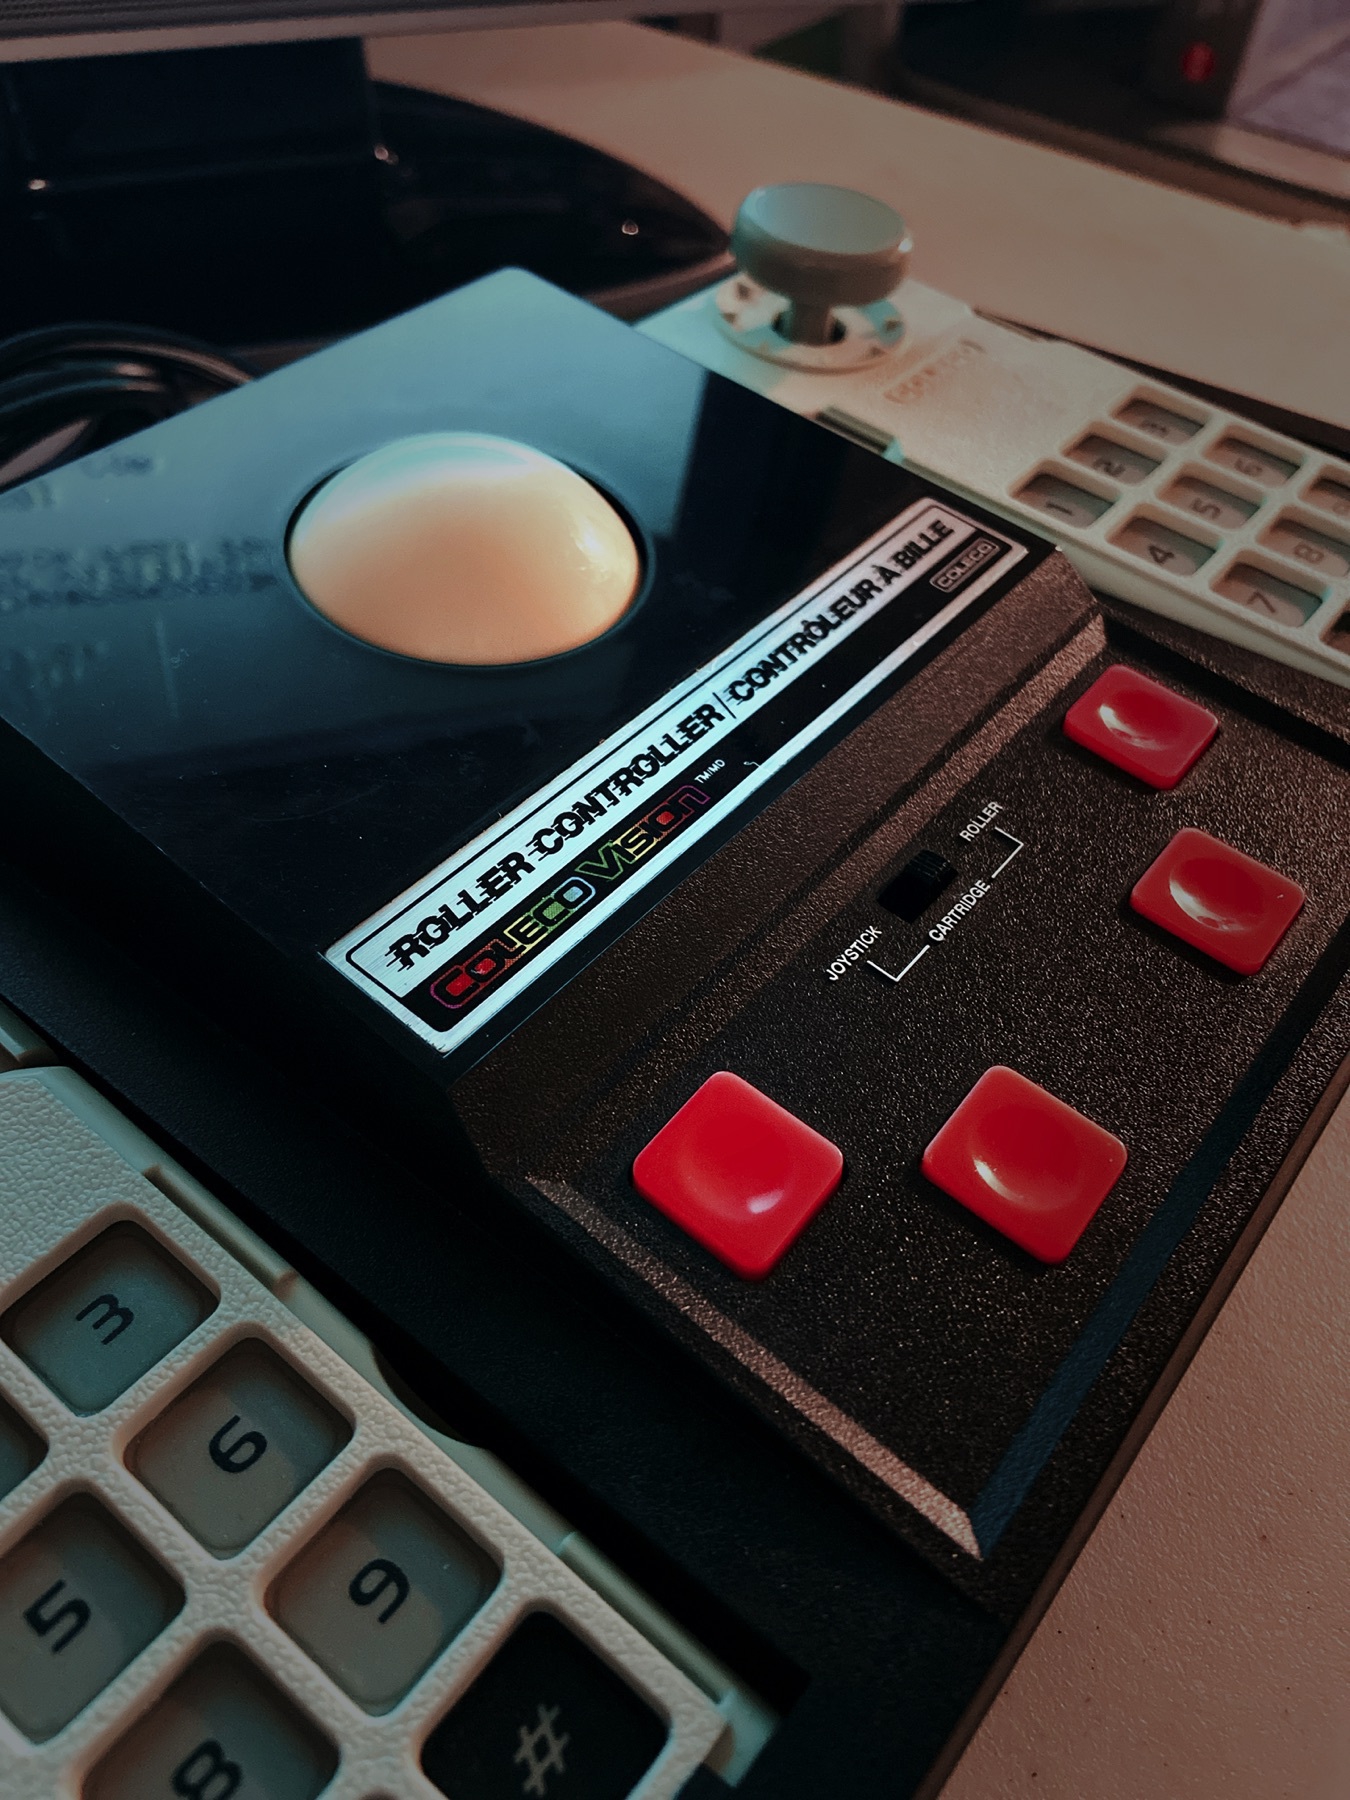
🚨New hardware alert! Got a 🖲 ColecoVision Roller Controller in great condition from my new friend James at crt-international.com. I love it! Definitely adds some arcade authenticity to games. Took me right back to playing Centipede in the arcade. Good times! 🎮🕹 #ColecoADAM
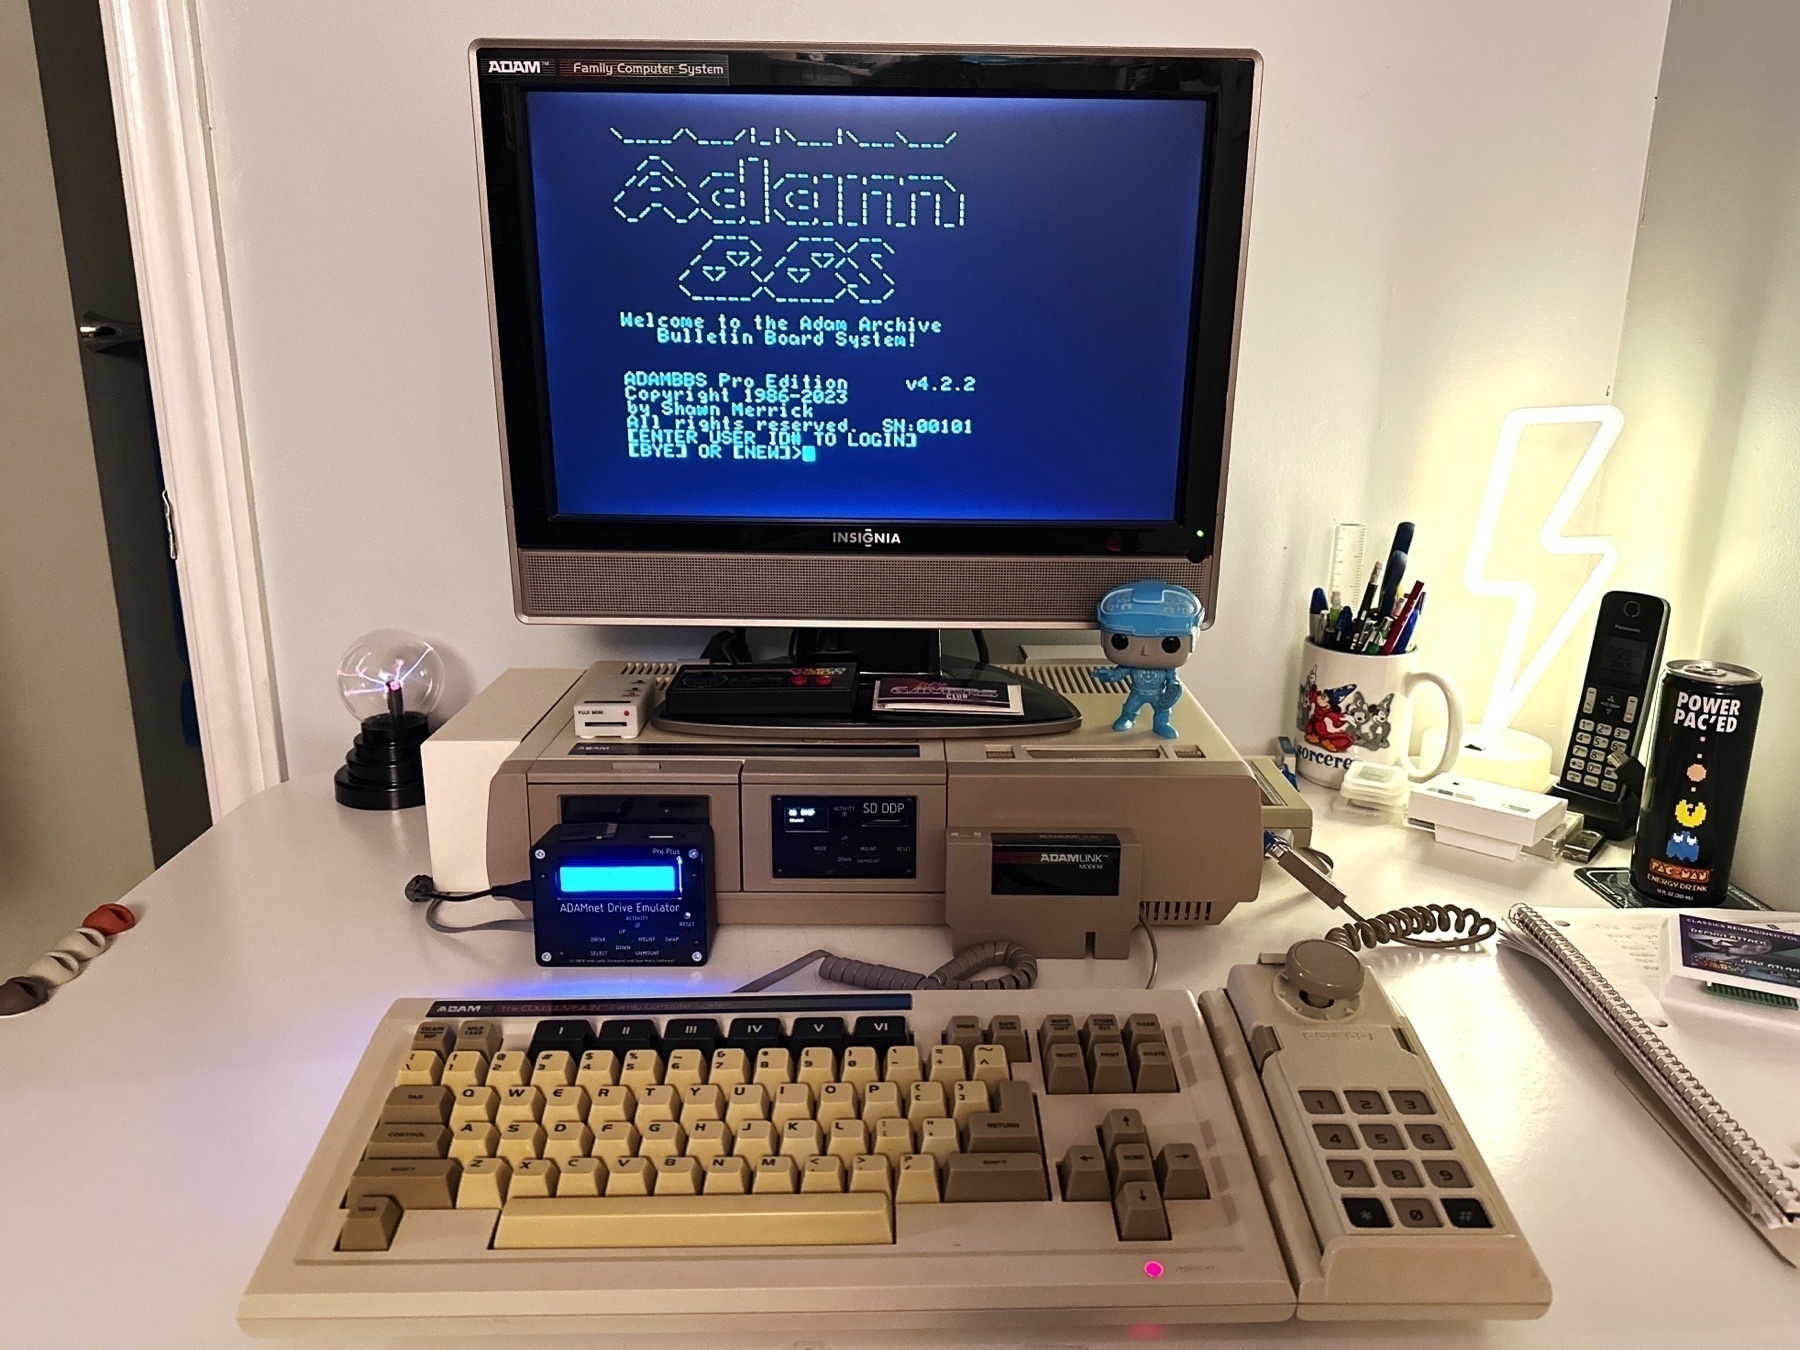
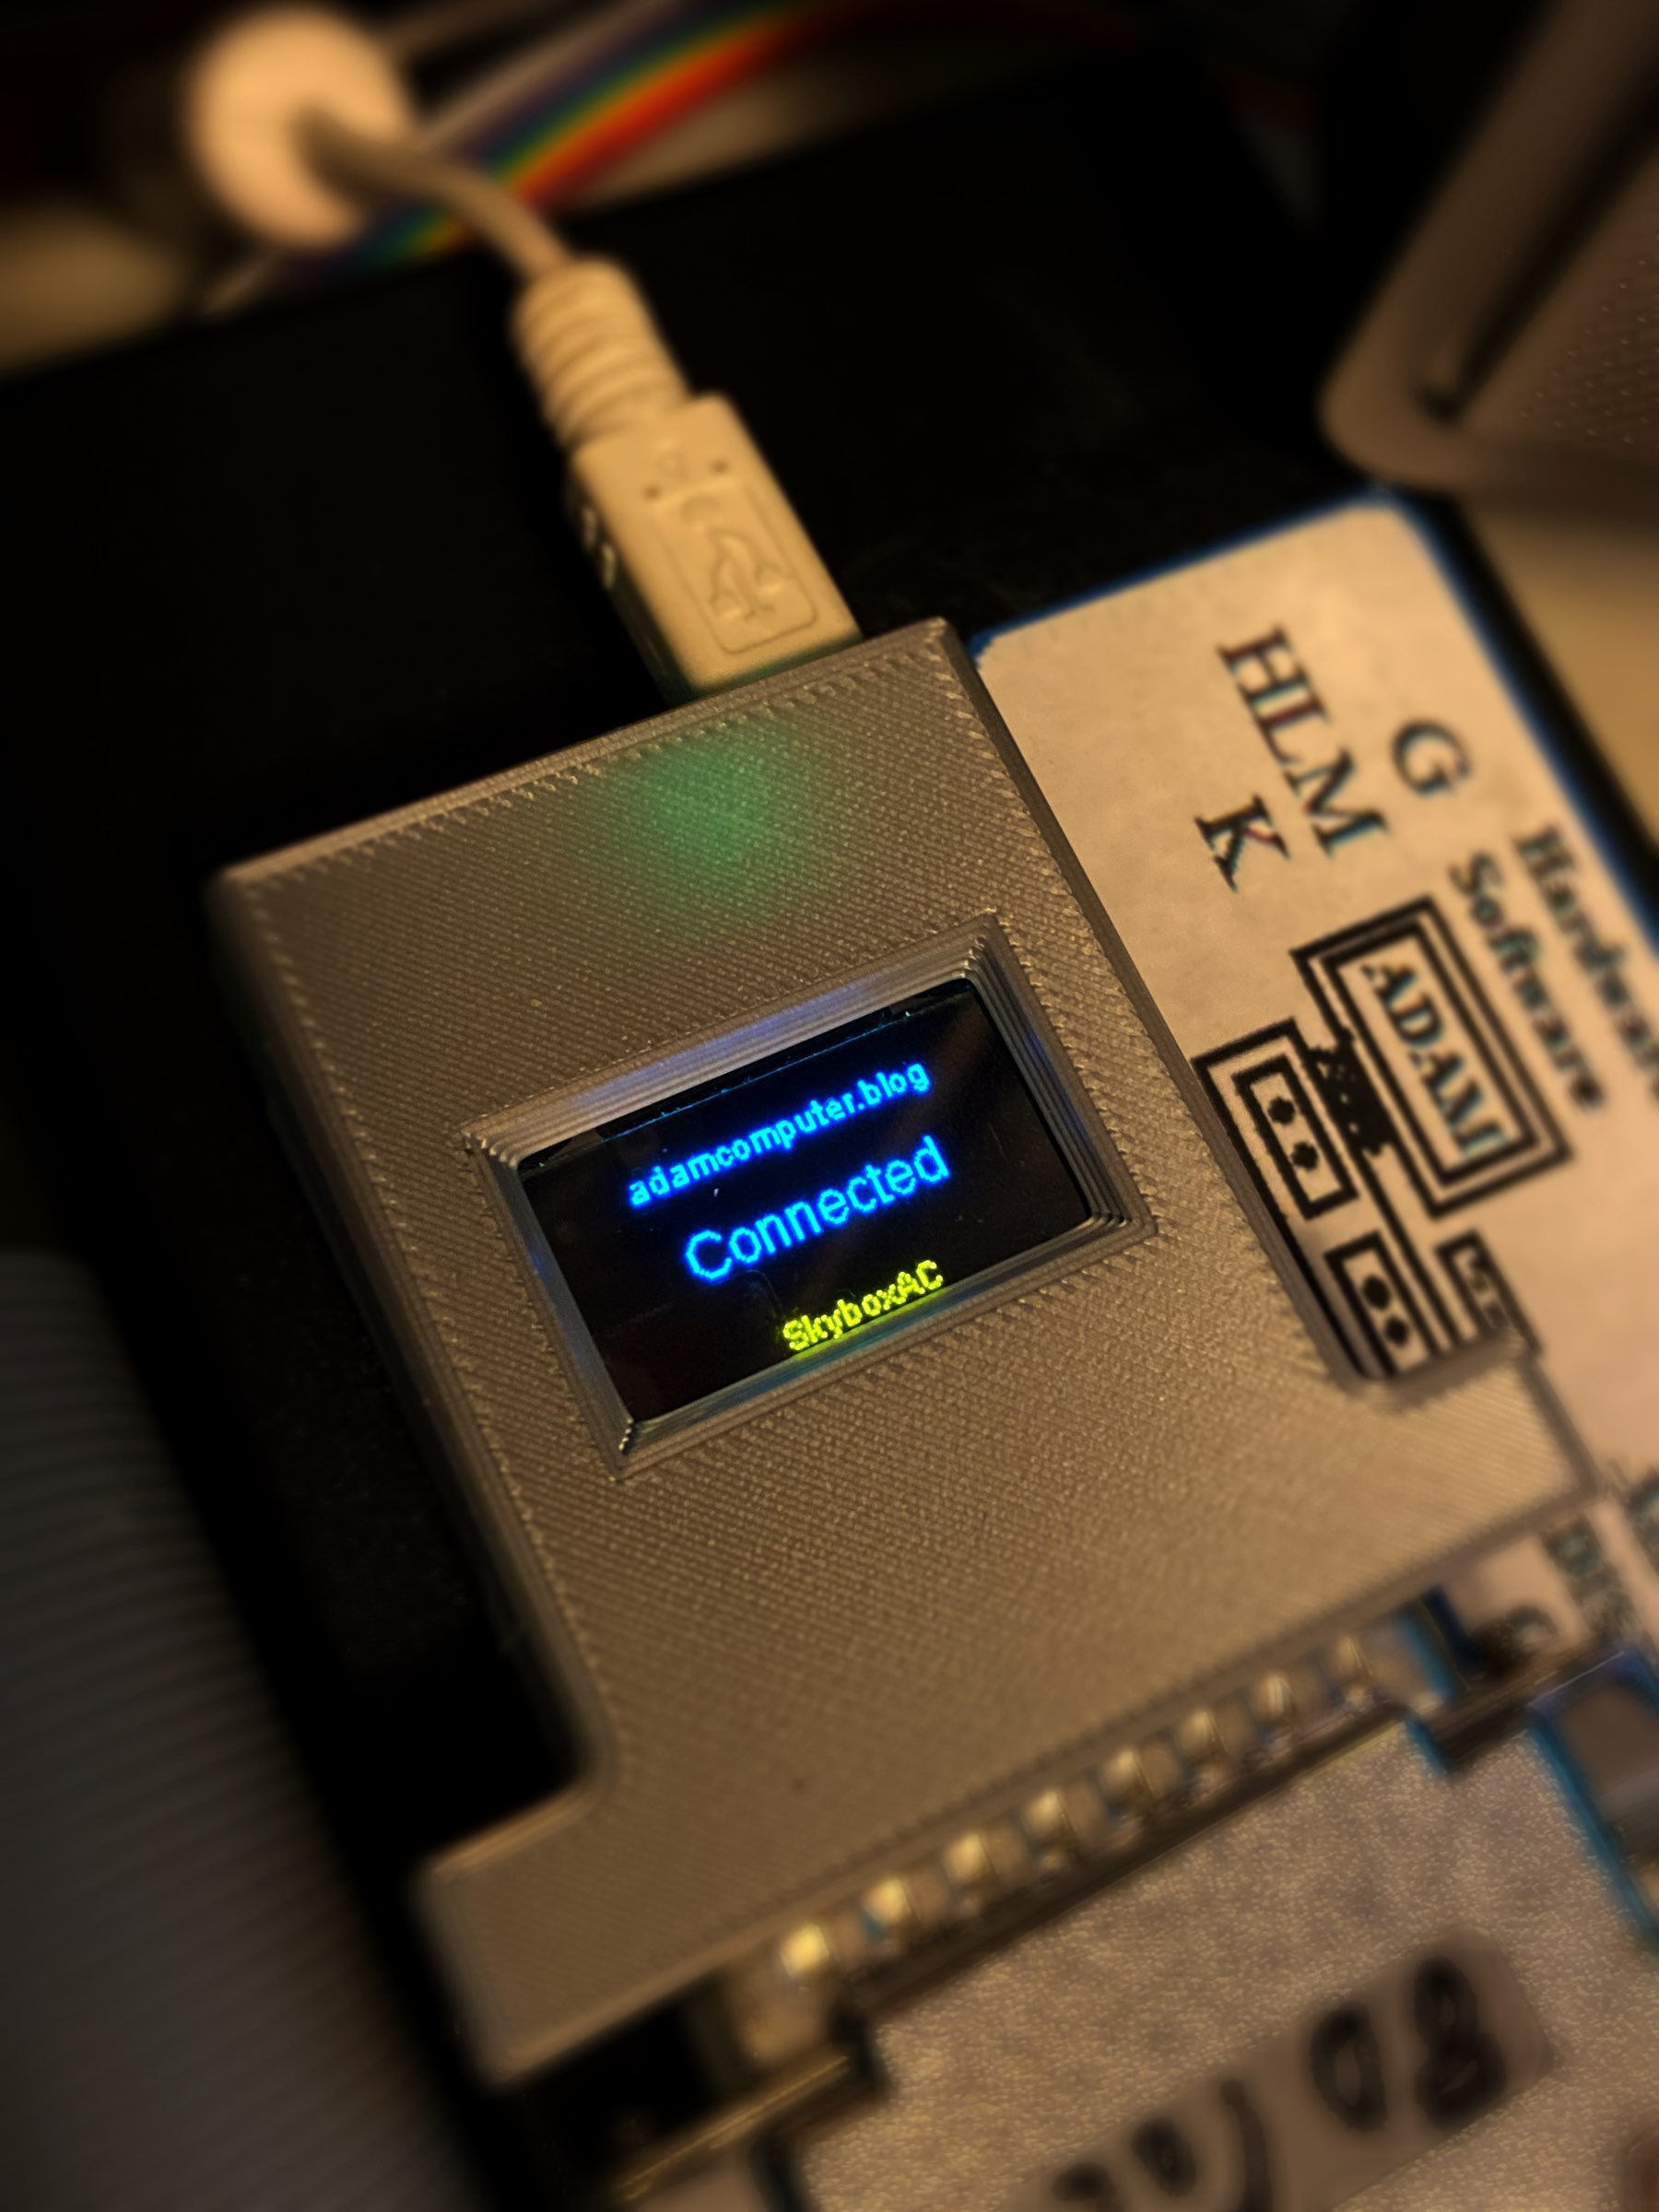
I finally have a serial port for my ADAM! A special thanks to rietveld and adamcon over at the AtariAge forum for helping me find one. I got an external unit that connects to the memory console’s side expansion port.
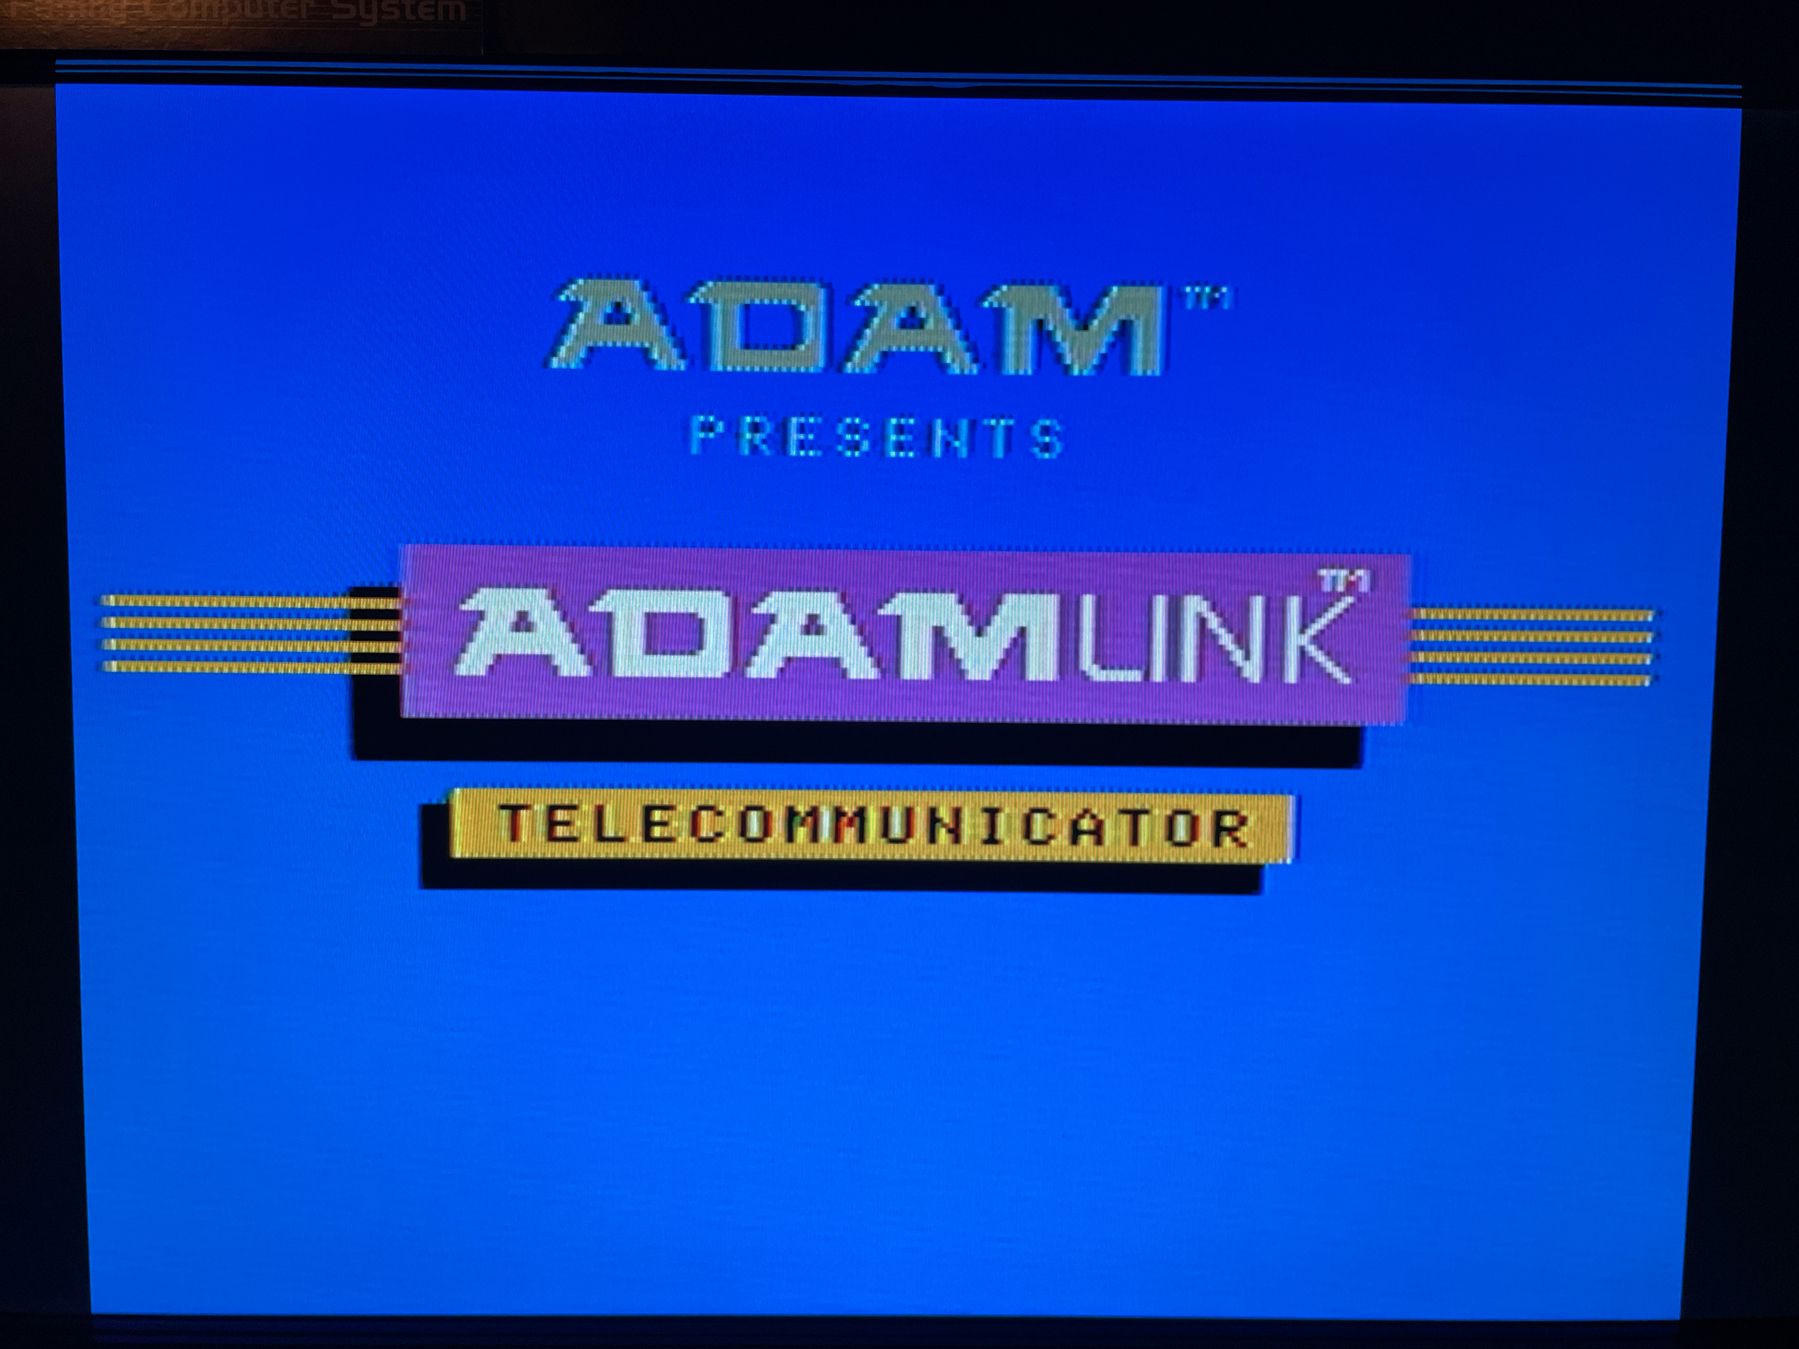
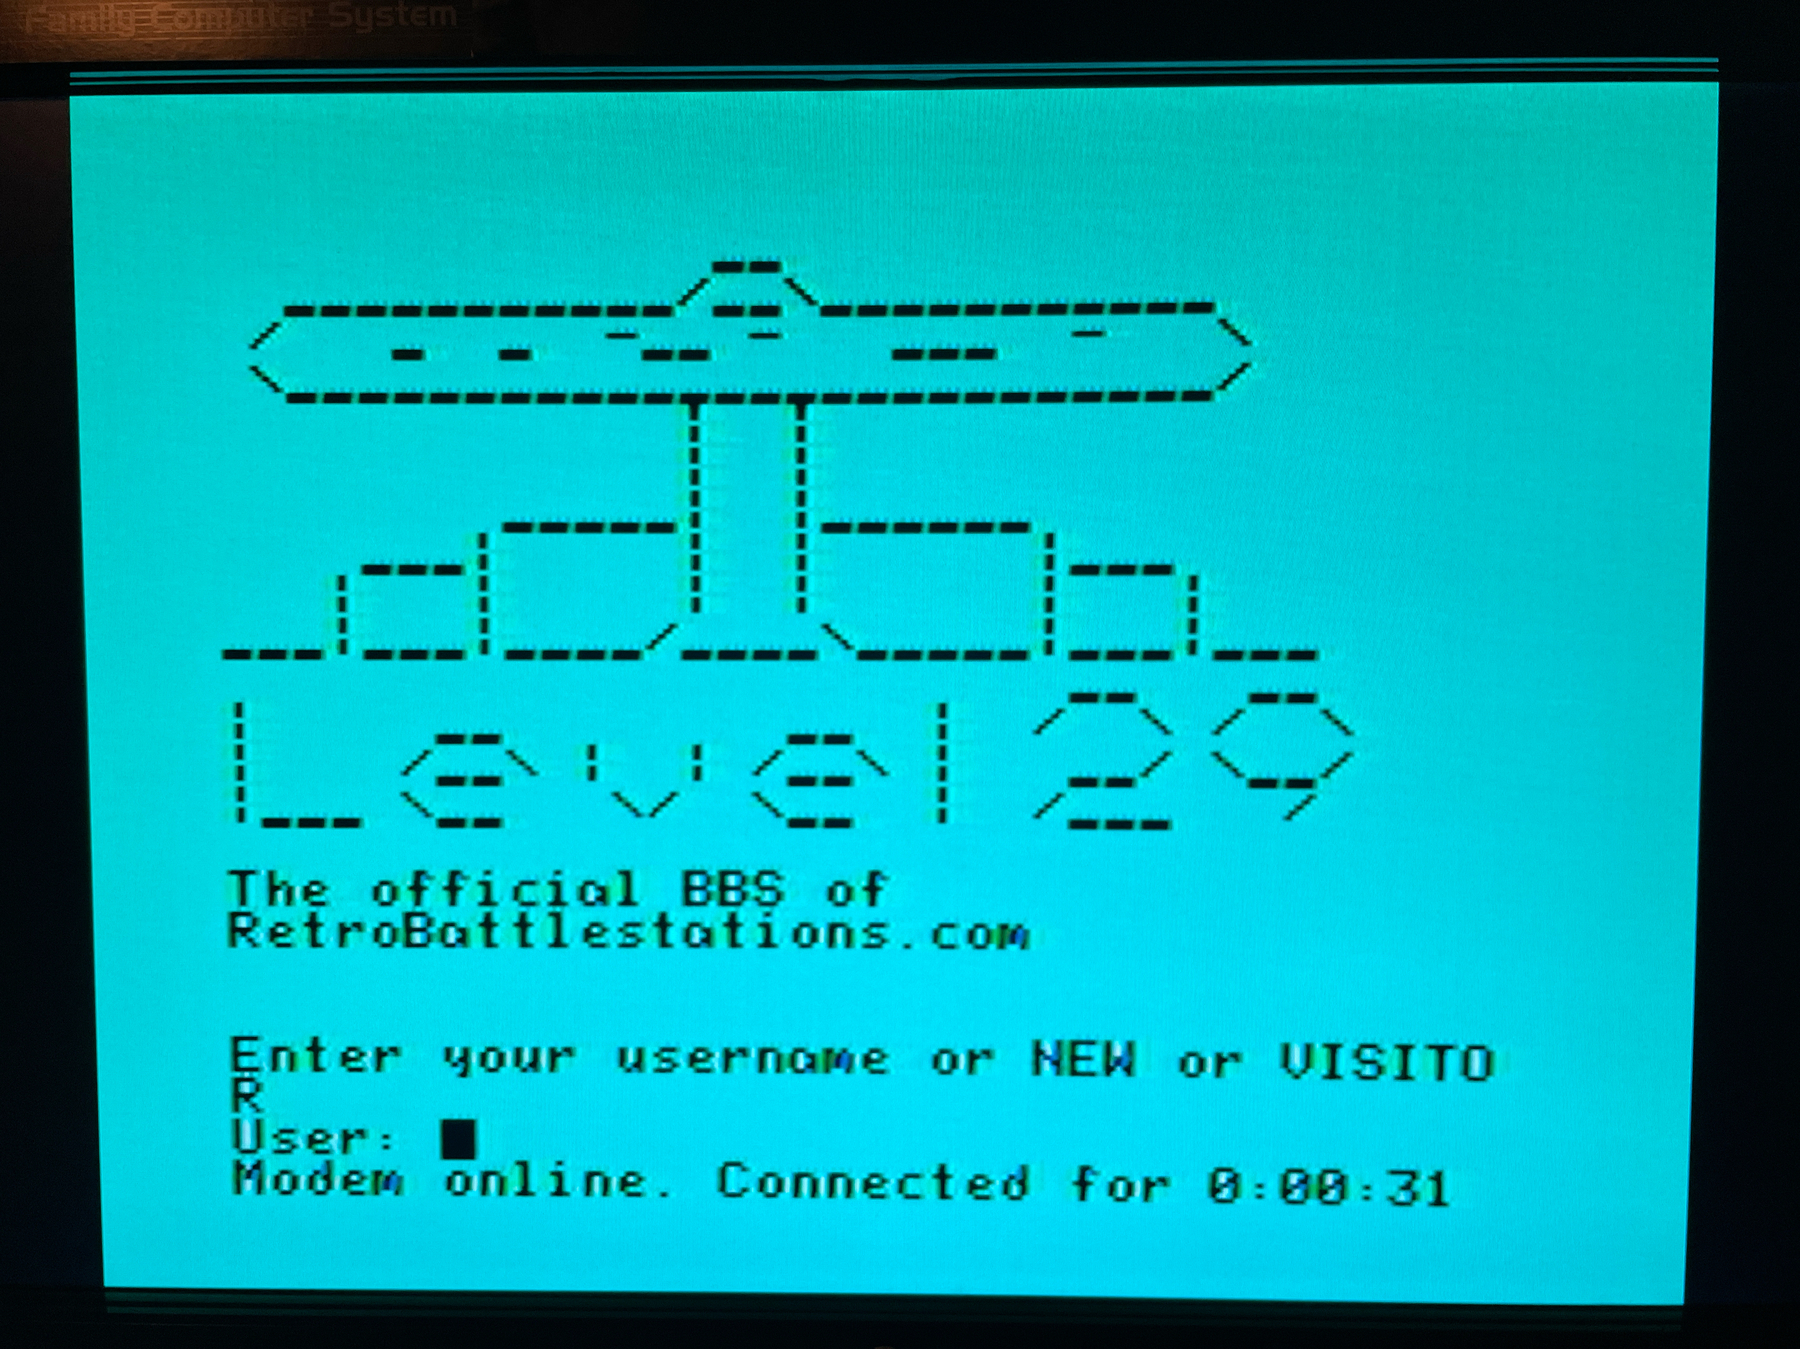
I’ve had a WiModem232 ready and waiting for this day. Got it all set up and working perfectly using the awesome ADAMLink V terminal software and within minutes I was connected to a BBS just like the old days.
This is incredibly cool. It just blows my mind that my computer that was made way back in 1983 is now connected to the internet via WiFi. I highly recommend the WiModem232!
I scored a second digital data drive for just $10! It has substantial yellowing but I installed it and it works like a champ. To me, the high-speed tape drives are an important part of ADAM’s “identity” so it’s nice to have a backup.
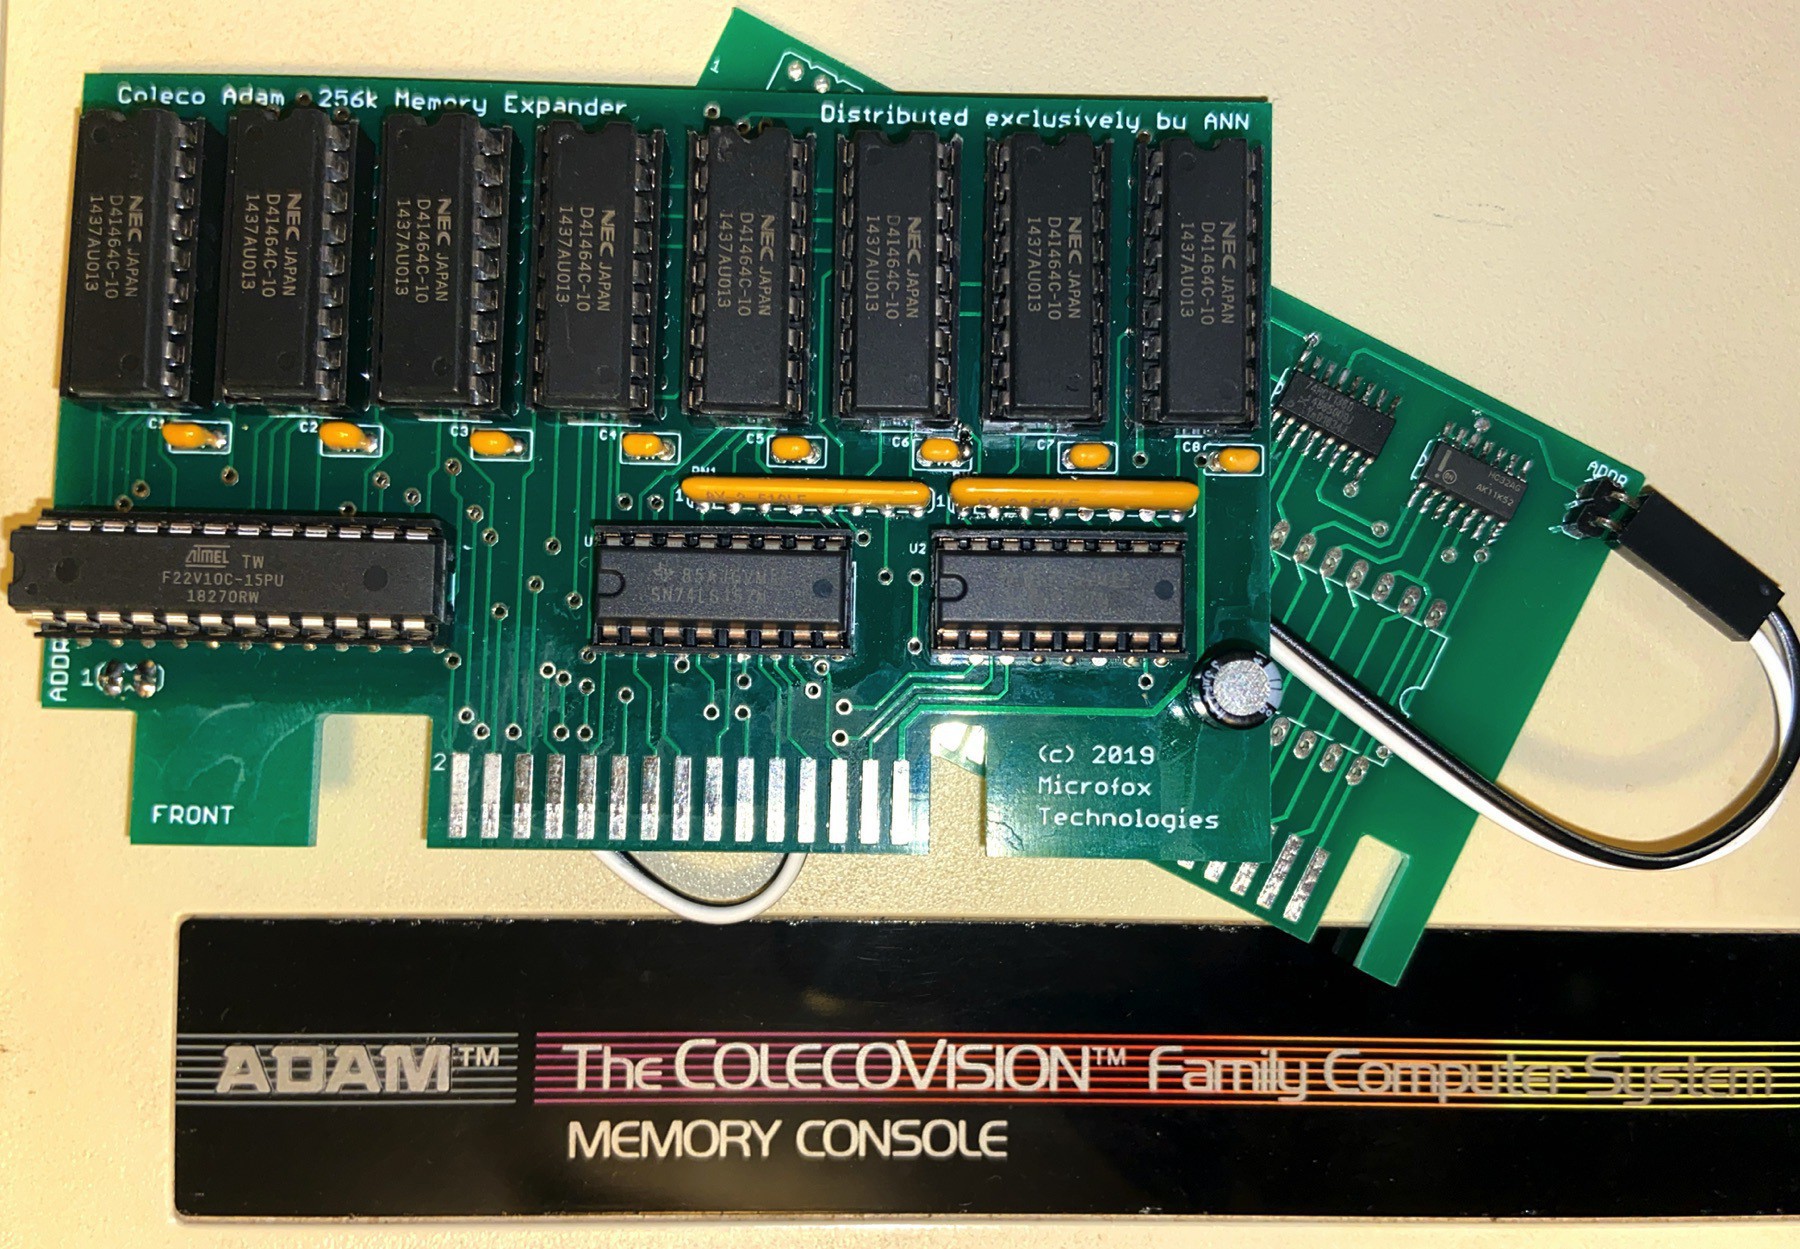
New hardware alert! My 256K memory expander from MicroFox arrived on Friday and I was able to set aside some time this weekend to install it and try it out. One thing you’ll notice if you look at the pictures is that there are actually 2 cards that make up this expansion. One card is the actual expander that contains the memory chips and the other is a connected “addressor” card. The addressor card sits in slot #2 and allows Adam to address expanded memory beyond 64K.
Even with the addressor card, most ADAM software can only use the system’s base 64K RAM + 64K of expansion memory (Coleco shipped their own 64K expander back in the day). So you might ask “what’s the point of installing more than 64K?” The answer: RAM DISK!
CP/M and T-DOS (an awesome CP/M variant for ADAM) both recognize all the extra memory and use it as a super-fast RAM disk. This will be very convenient when I’m working with Turbo Pascal for example because the compile times fly since any include files can be pulled from RAM instead of disk or tape.
For EOS (Adam’s built-in OS) there are a wealth of RAM disk utilities available (like Adam’s Desktop, SmartDSK, MegaDisk, and many more) and I’m still exploring them to see which will suit my needs best. Most of these tools give the user the option of using the entire expander as a RAM disk or reserving one 64K bank of memory for expanded RAM and allocating the rest as a RAM disk. Which option you choose just depends on what you want to do with Adam at that time. The coolest thing about using a RAM disk with EOS is that the contents persist even when you reset the computer! Only a complete power-down destroys the contents. This allows me to treat the RAM disk as a sort of temporary hard disk since I can reset the computer to load other programs without disrupting my files. I can see this being very useful for jumping between SmartBASIC and a sprite editor for example. Speaking of SmartBASIC, loading code from the RAM disk is obviously incredibly fast and the expanded RAM gives me a lot of room for larger and more complex programs to be written.
I’m still wrapping my head around all the benefits of having this extra RAM but one thing I know for sure is that this 256K expander is an excellent addition to my Adam!

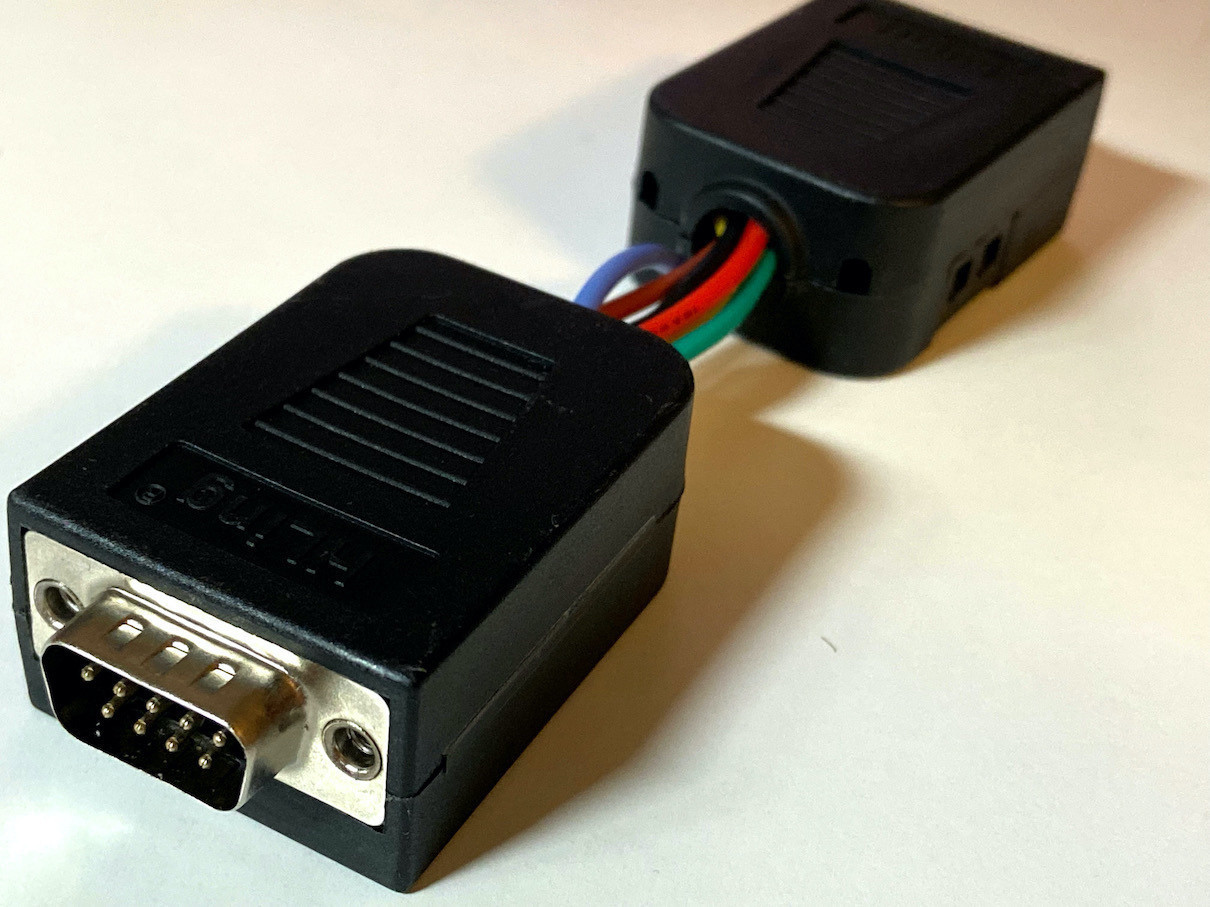
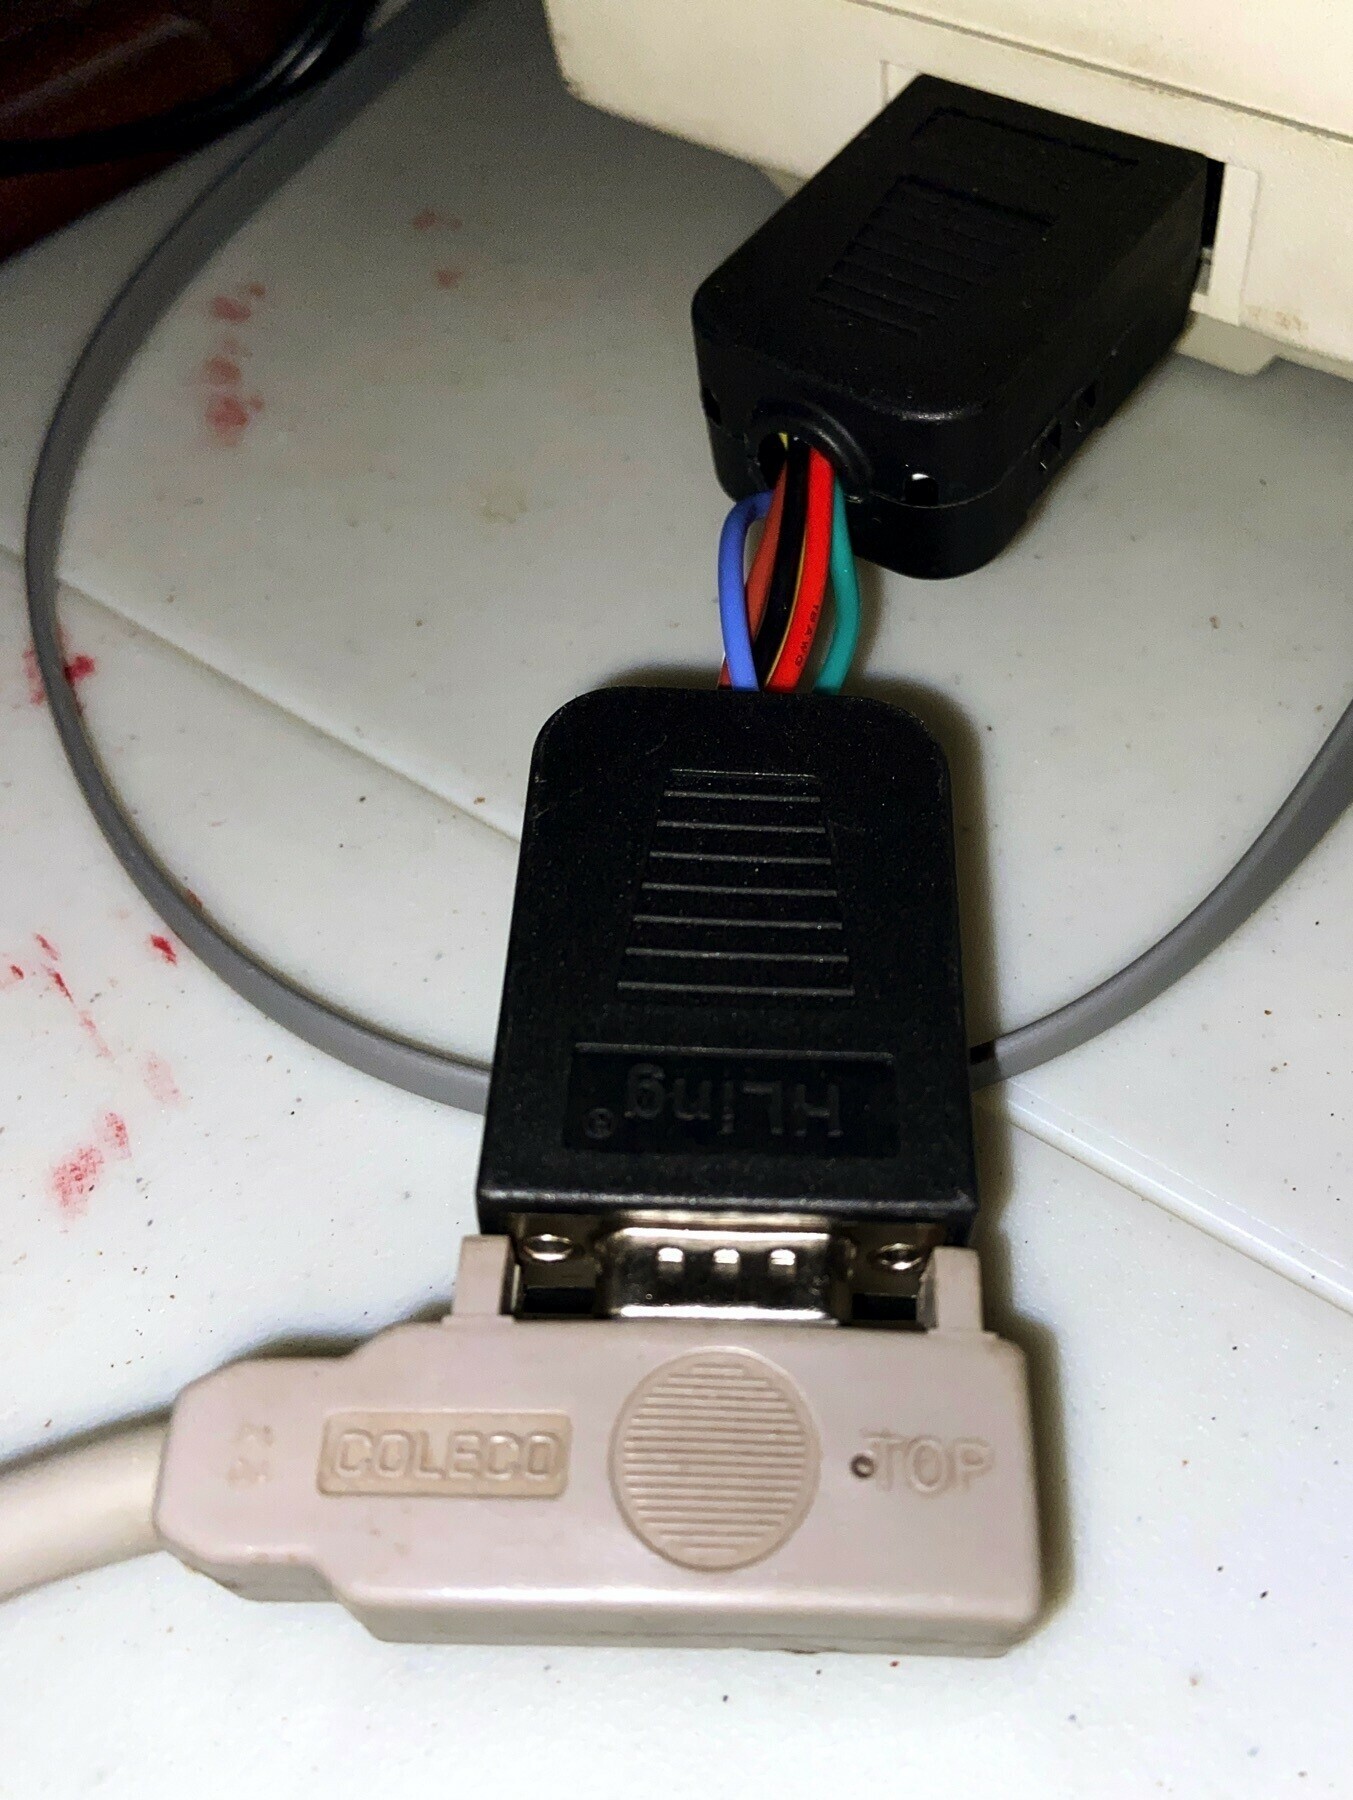
One of the quirky things Adam does is every time you pull the reset switch on the computer the SmartWRITER printer will do a noisy reset of its own including a linefeed which pushes the paper up one line. Trying out software using my ADE Lite drive requires me to reset the computer to load a different disk image so its something I do quite often. The noisy printer reset quickly became annoying. After looking at the ADAM Technical Reference Manual and asking around on the SmartBASIC forum I discovered that it’d be pretty easy for me to build an adapter that would prevent the computer from sending the reset signal to the printer. So a few weeks ago I ordered some wire and DB-9 ports and put it all together. Essentially it is just a straight connector with all the wires in place except the “reset” wire. Works perfectly! Okay, so it isn’t much of a hack but I was pretty happy about it. Gotta start somewhere, right?
I’m mainly a software guy. However, hardware has always fascinated me and one of the things I’ve learned since diving into the retro-computing world is that having some basic electronics skills can really come in handy. With that in mind I have registered for this course on Udemy. Hopefully it will help me level up!